A long time ago in a land far, far away...I got an AT-AT for Christmas. It was 1981 on Christmas Eve, and I was 5 years old when my world changed with that gift. The thing was like a robot dog almost as big as me! My aunts and uncles put their money together to get it for me. I don't think it was something I asked for and my parents couldn't afford it, but I am so grateful for that toy. A year before that Christmas, when Empire Strikes back came out in theaters, I distinctly recall my uncle Peter telling me that I was not old enough to see it. I was heart broken and I didn't even know exactly what Star Wars was yet! I just knew that the toys were amazing and other kids on the playgrounds had them and coveted mine. I remember the day I lost my C3-Po to the sandy bottom of the playground in our apartment complex. I searched for hours and every time I went back there, I searched. Star Wars was the introduction of the wonderful world of toys for me and I never really got over it. Even after I got out of my Star Wars phase, another property or "license" replaced it. Transformers was a big one for me, too. My best friend Mike Kondis and I would put our figures together, build forts out of the packaging and create our own scenarios. The forts started to get so complex that we would tape them together with whatever we could find. I hated dismantling them so I began to build them in my very small bedroom closet. When I think back to those action figure forts I made and look at what I make now, I guess you could say, I'm out of the closet!
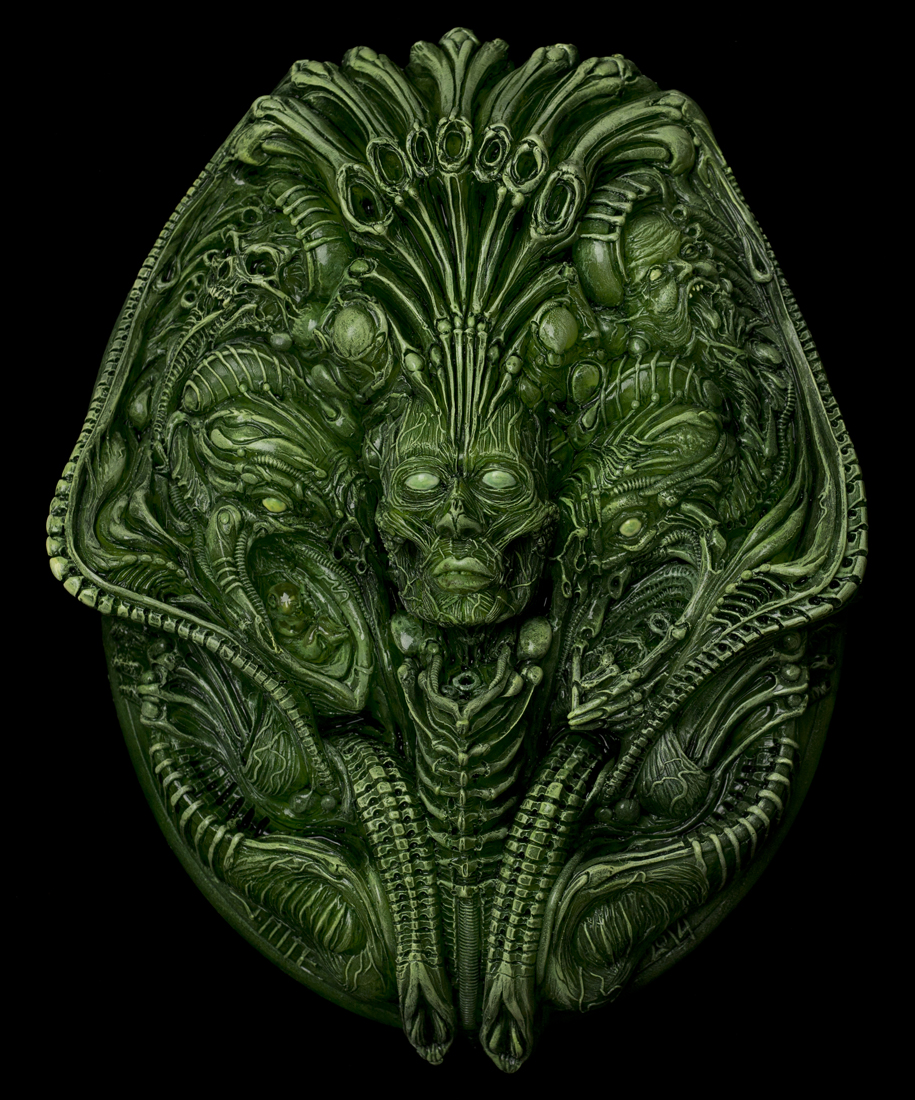
Have a look at the little intro video I made of the piece. The sculpture will be in the Copro Gallery's Conjoined V show, which runs January 24th - February 14, 2015. The size is approximately 59" tall x 41" wide x 10.5" deep. Come check it out in Santa Monica if you have the chance; I'd love to meet and talk about it at the opening show.
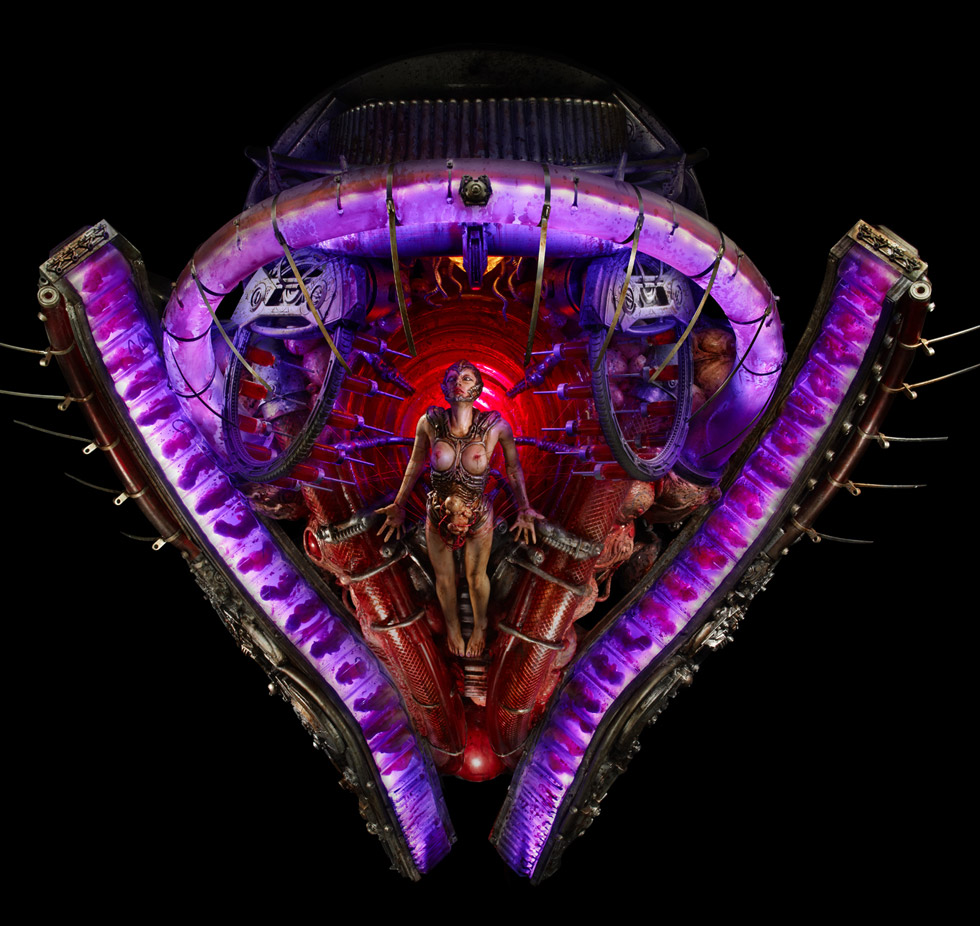
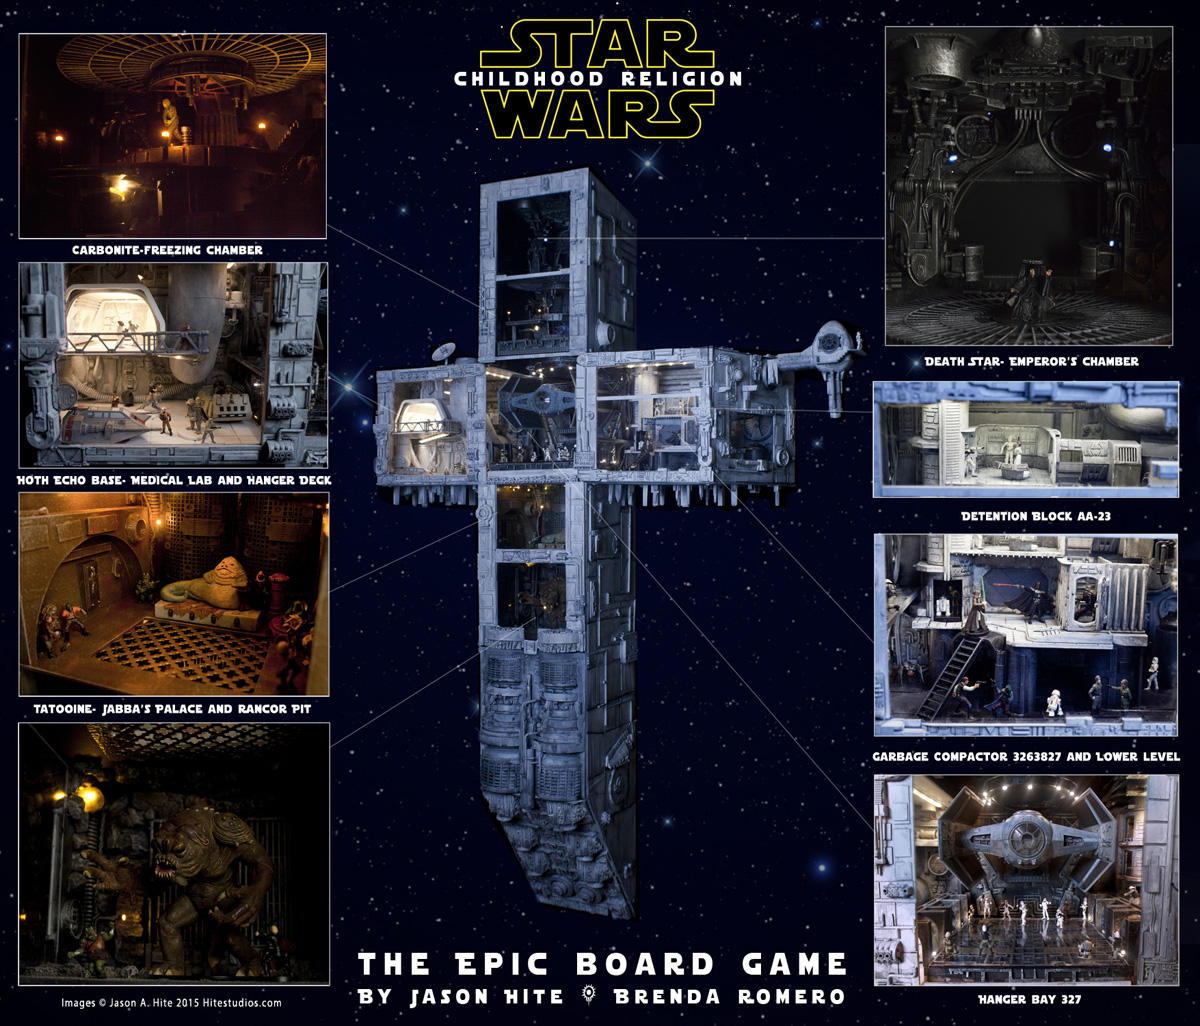
This assemblage sculpture represents that part of my childhood along with the millions of other kids who played with and collected Star Wars toys. There are seven different room or scenes within the "cross-destroyer" I created. It started with the discovery of some vintage 80's Star Wars play sets I never saw growing up and highly detailed game pieces of every fucking character from the movies and then some. I got obsessed with getting certain figures and I didn't even have a plan at that time. I just wanted the ones I always wanted as a kid!

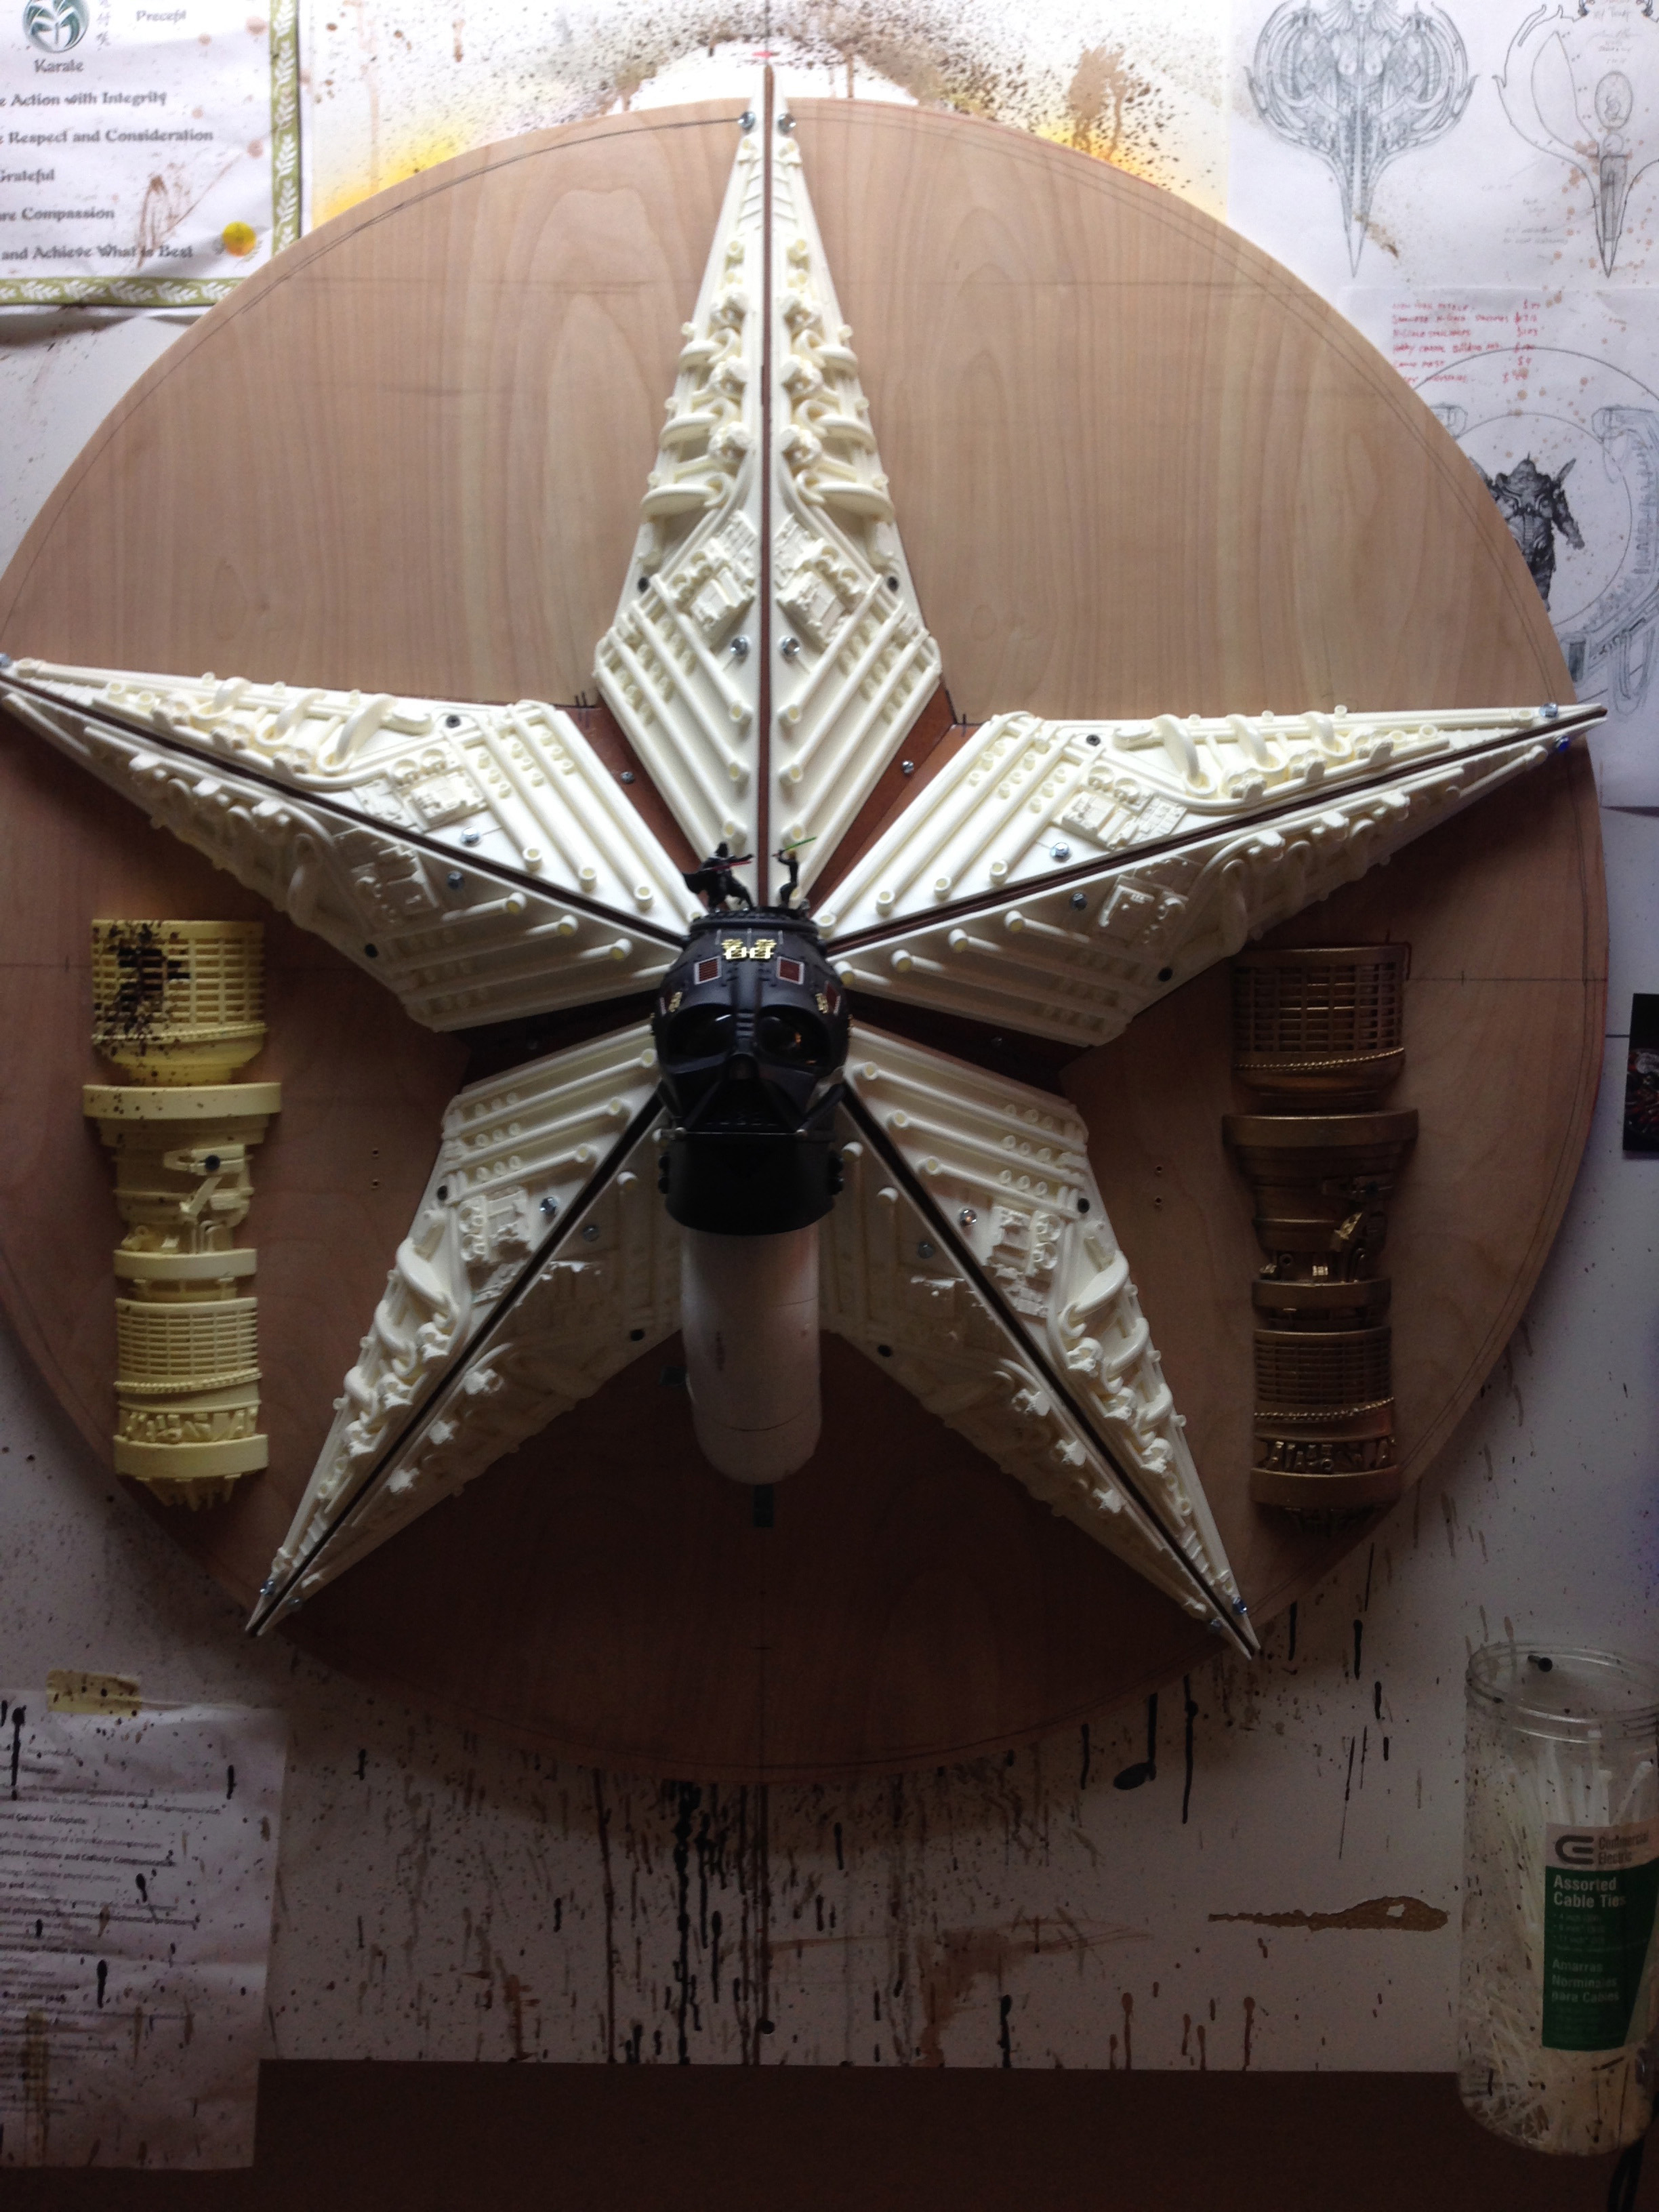
Not having a good plan to start is a bad idea. Here is why. In January of 2014, I thought I had it. I thought I knew what I was going to do. I used an old star I made back in 2012 to make a "Death Star" using figures and sets. It was going to be awesome, right? WRONG! It looked terrible no matter what I did with it. It was an overcomplicated shape and anything I wanted to add around it looked bad. Frustrated the hell out of me. So I tore it apart, but my kids, 6 and 3, both loved all the Star Wars stuff I was collecting. They constantly wanted to play with it. Go figure. Then one day, my son Lucian, the 6 year old, and I took just the round wood base without the star, and cobbled together the sets into a little scene. We built it at his height about 3.5 feet off the ground. It was great! The kids played with it, set up their own forts with the bits I have around my studio and played with the figures. It was so cool to watch them play with it while I worked on other projects in my little sculpture room. I didn't realize this until now, but it was like a full circle from my childhood to theirs. I'm kicking myself for not taking a picture of it!
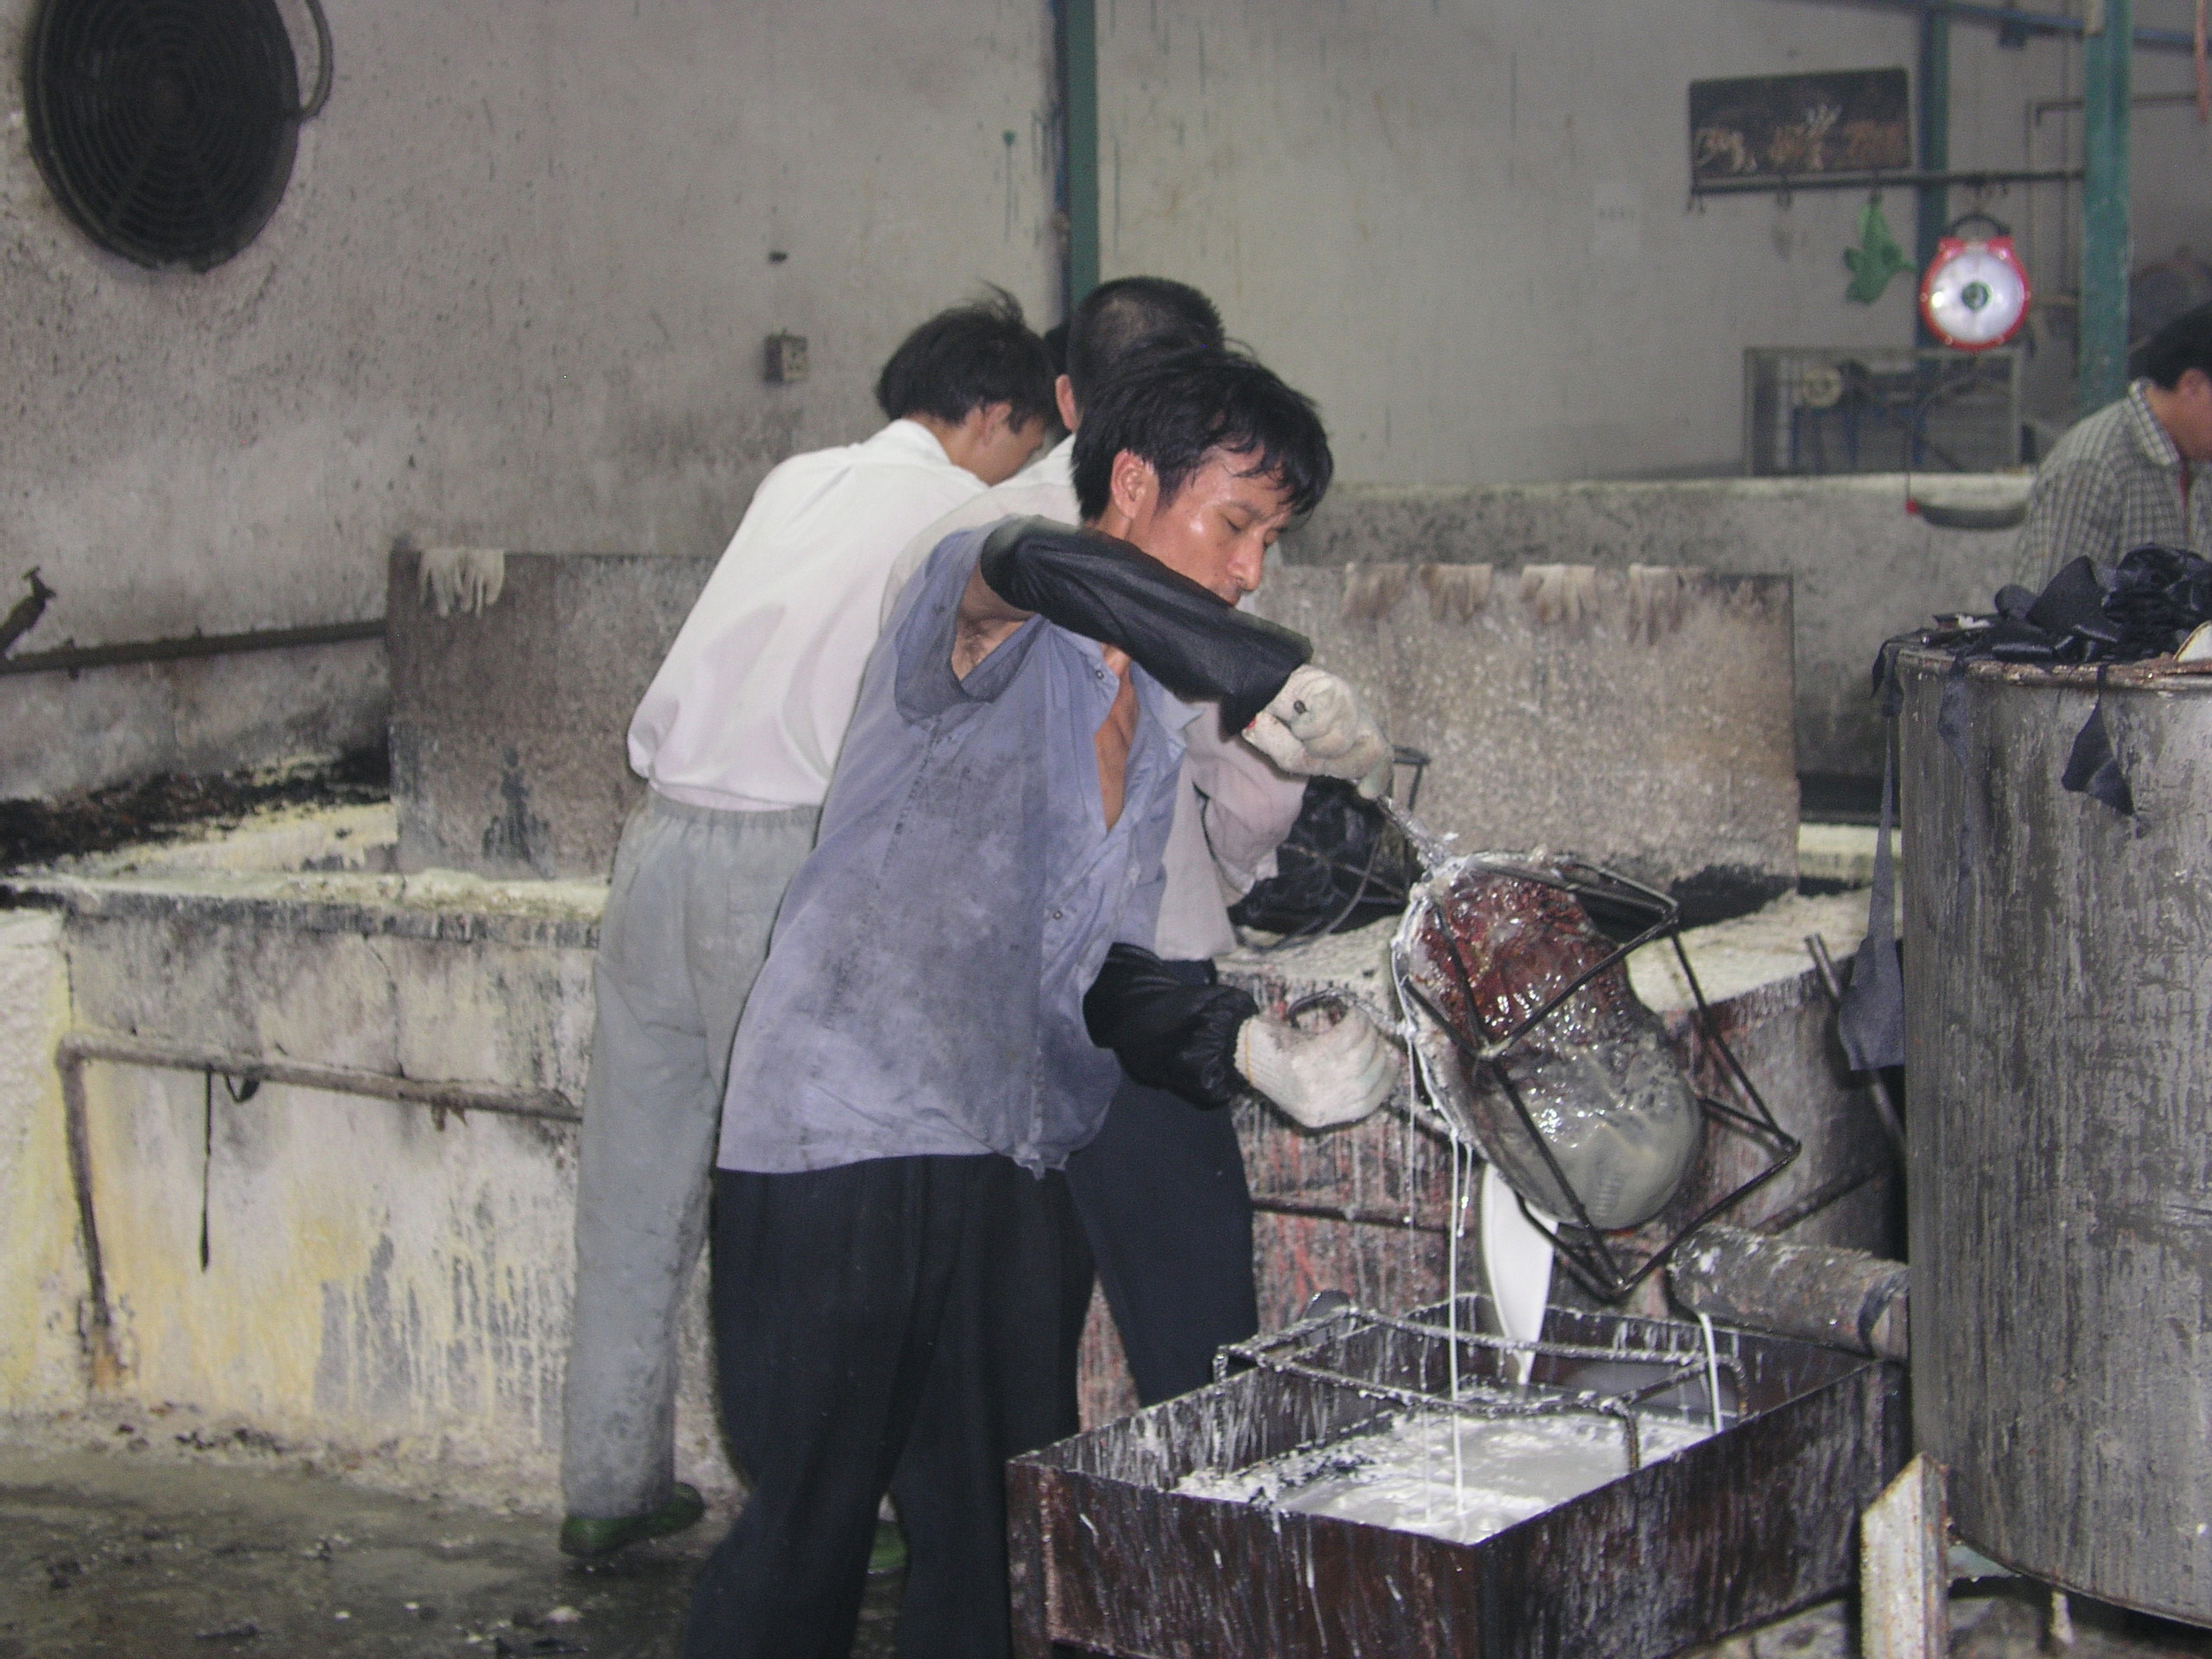
In November of 2014, I woke up one morning, sat down in my studio and looked at something my son arranged with the figures on the set we built. A battle scene that always changed whenever he came in to play. It was then I decided to take another stab at making something with the small fortune I spent on Ebay Star Wars toys. The moment I abandoned the circular base, I finally got my head around making something that looked right. Eventually, I landed on the cross shape. The hard angles are easier to make into rooms and I have an affinity for crosses. As kids, we are told to do things and made to go to school, go to church, obey your parents, teachers and so on. Things we don't really care about are jammed down our throats in those places by adults. Star Wars was something I wanted to know all about as a kid and it never insisted on itself. It was my religion, or faith, at the time, and all of the other kids I played with felt the same. Ironically, later in life when I was in college, two classmates in some of my classes would constantly debate Star Wars, every day for months. I got so sick of hearing about it I started to hate Star Wars. That hate got me thinking deeper about the dark side of it. The Star Wars license is what really started the entertainment-based action figure business that I love. How may tons of plastic toys, derived from petroleum, are made in a foreign country like China? How are the working conditions in those factories? How many of those workers making the toys out of hazardous materials are children themselves? We Americans tend to forget where our products come from and what goes into making them, and I'm not just talking about toys. Not to mention the economic problems outsourcing our factory work and labor to foreign countries causes. I've visited factories in China. Some of them were the worst places I have ever been. The smell of chemicals gave me a serious headache after 5 min. Below is a picture I took in a factory pouring hot vinyl. It was summer, sweltering hot, and that vinyl is heated to over 200 degrees to cast. The fumes alone are toxic to inhale. How many burns did this poor man and the others around him endure in just one week and for what? So that we can buy it in a store and discard it after a year? Millions of toys are made out of vinyl. They are not all done in this method, but I ask myself these questions when I look at a piece of plastic in the stores. I don't have all the answers, but I try repurpose as many things as I can. Never buy anything new if I can help it.

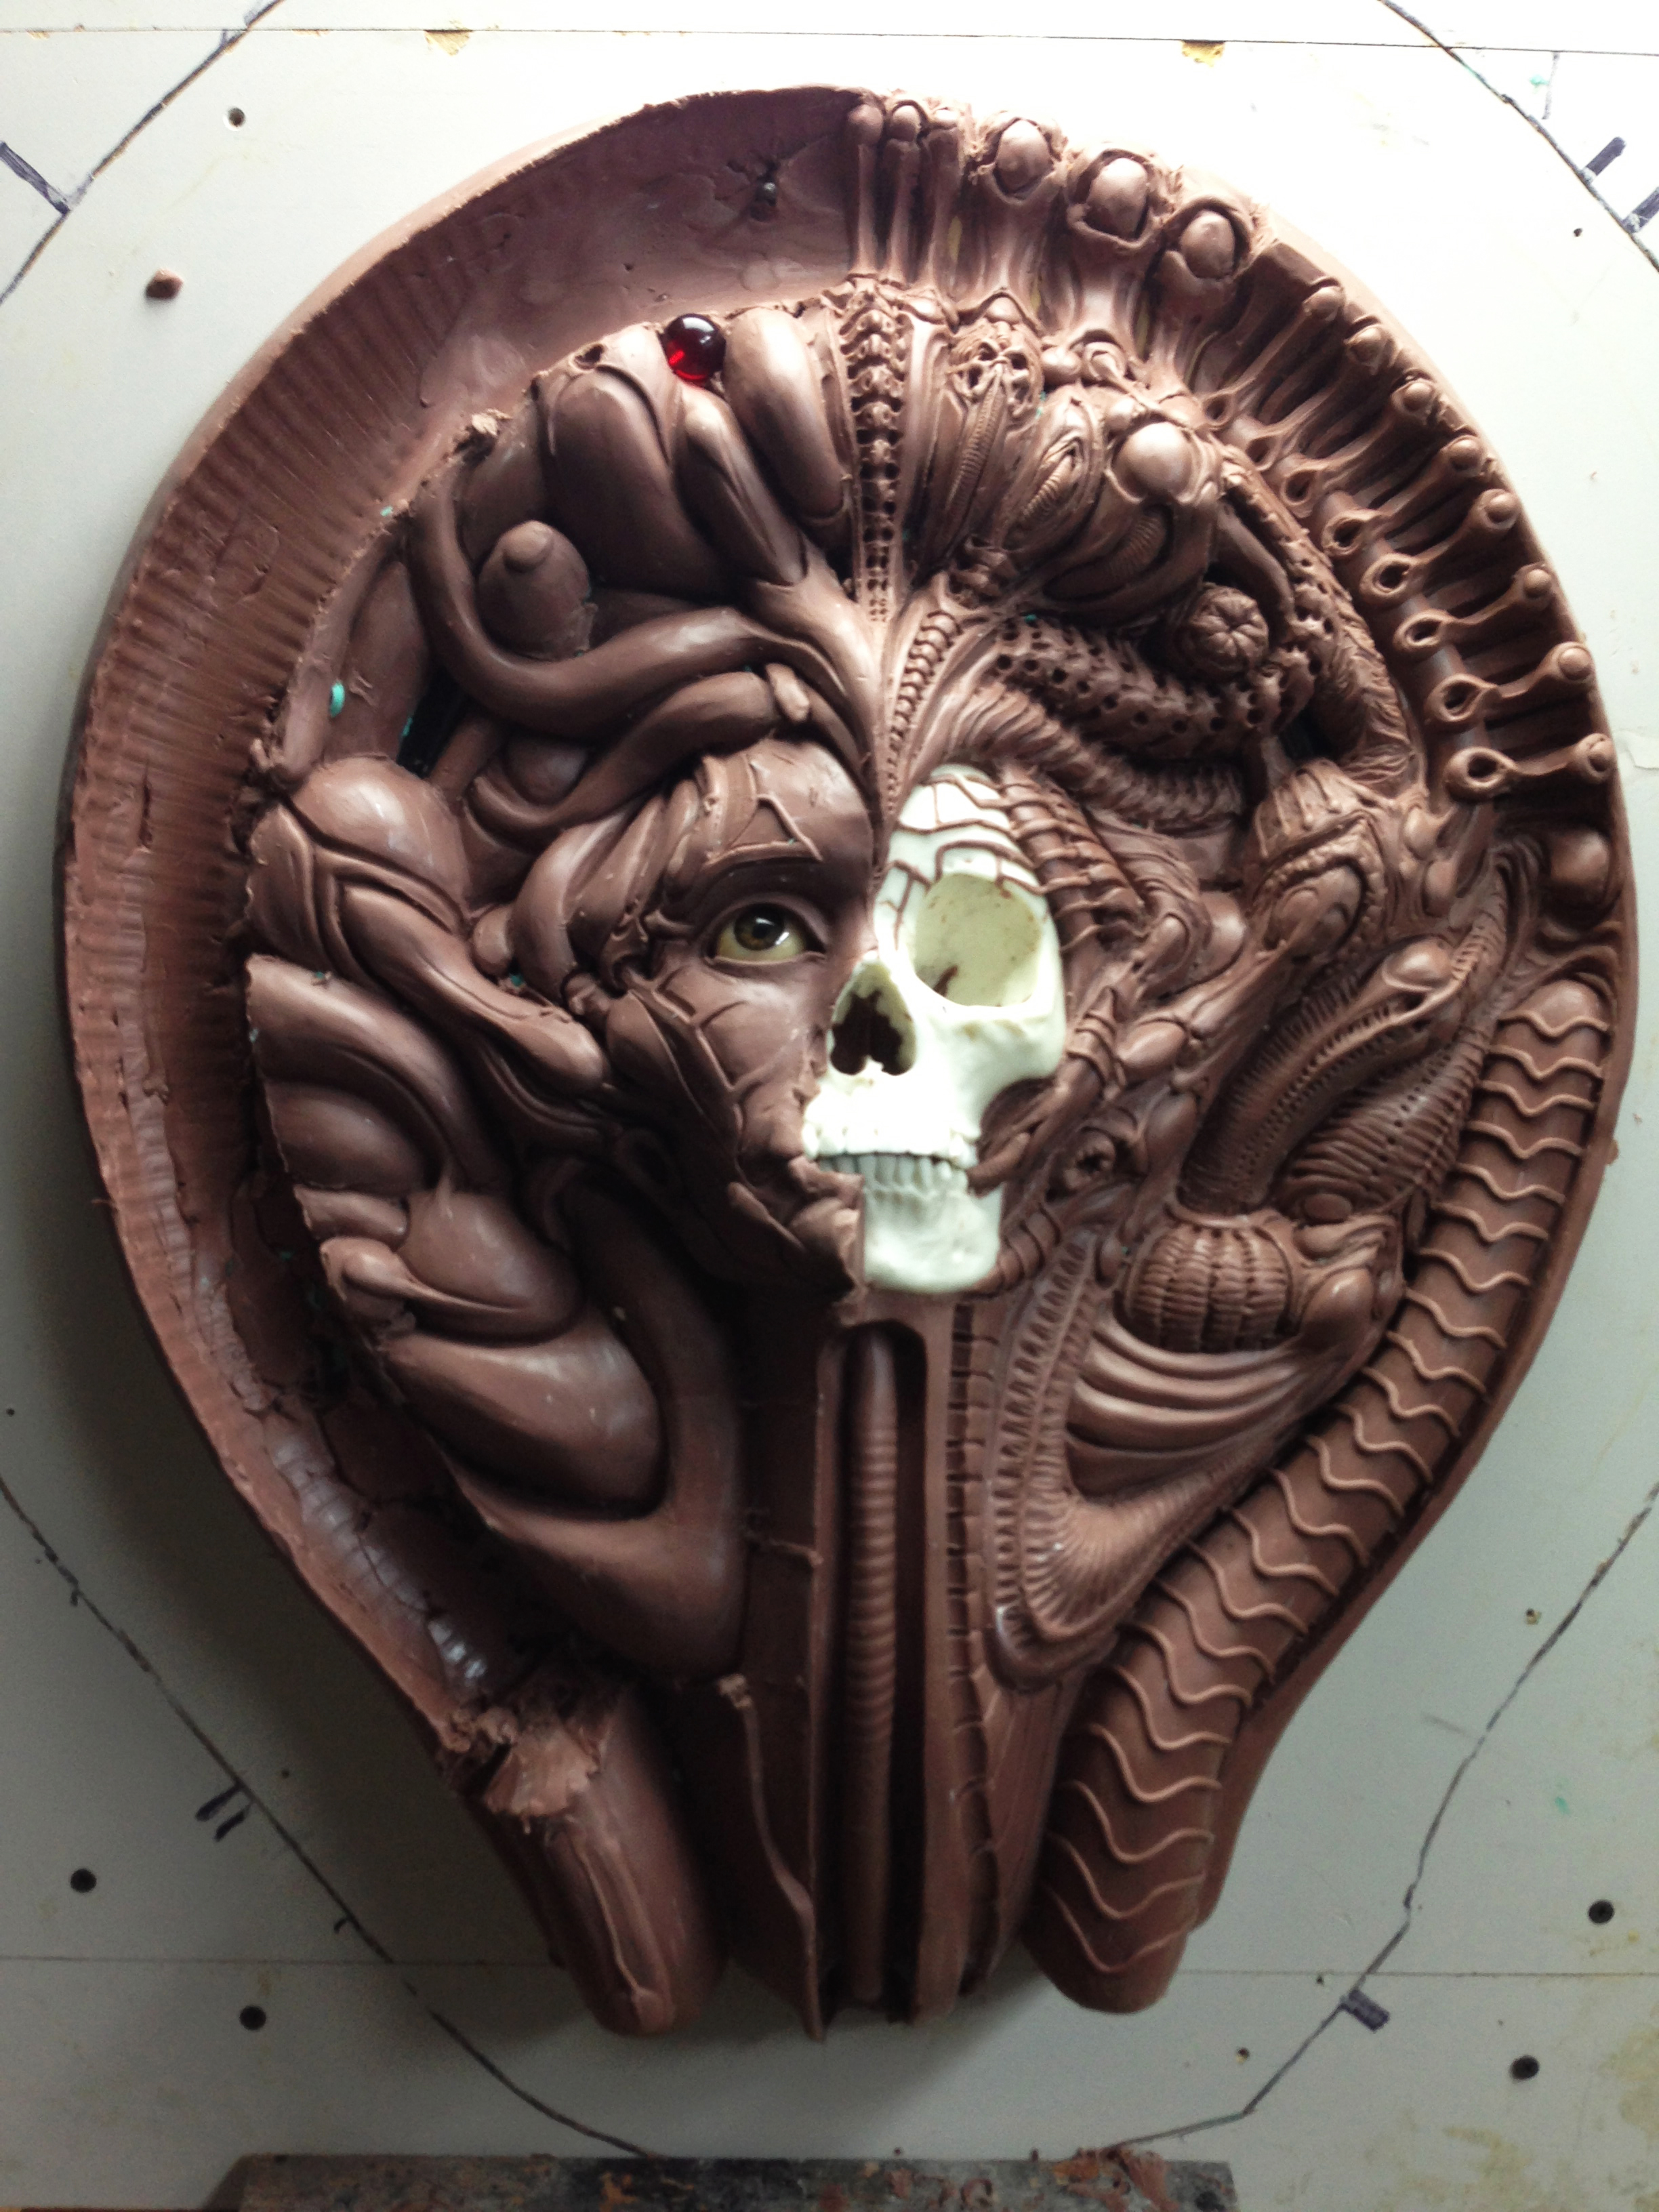
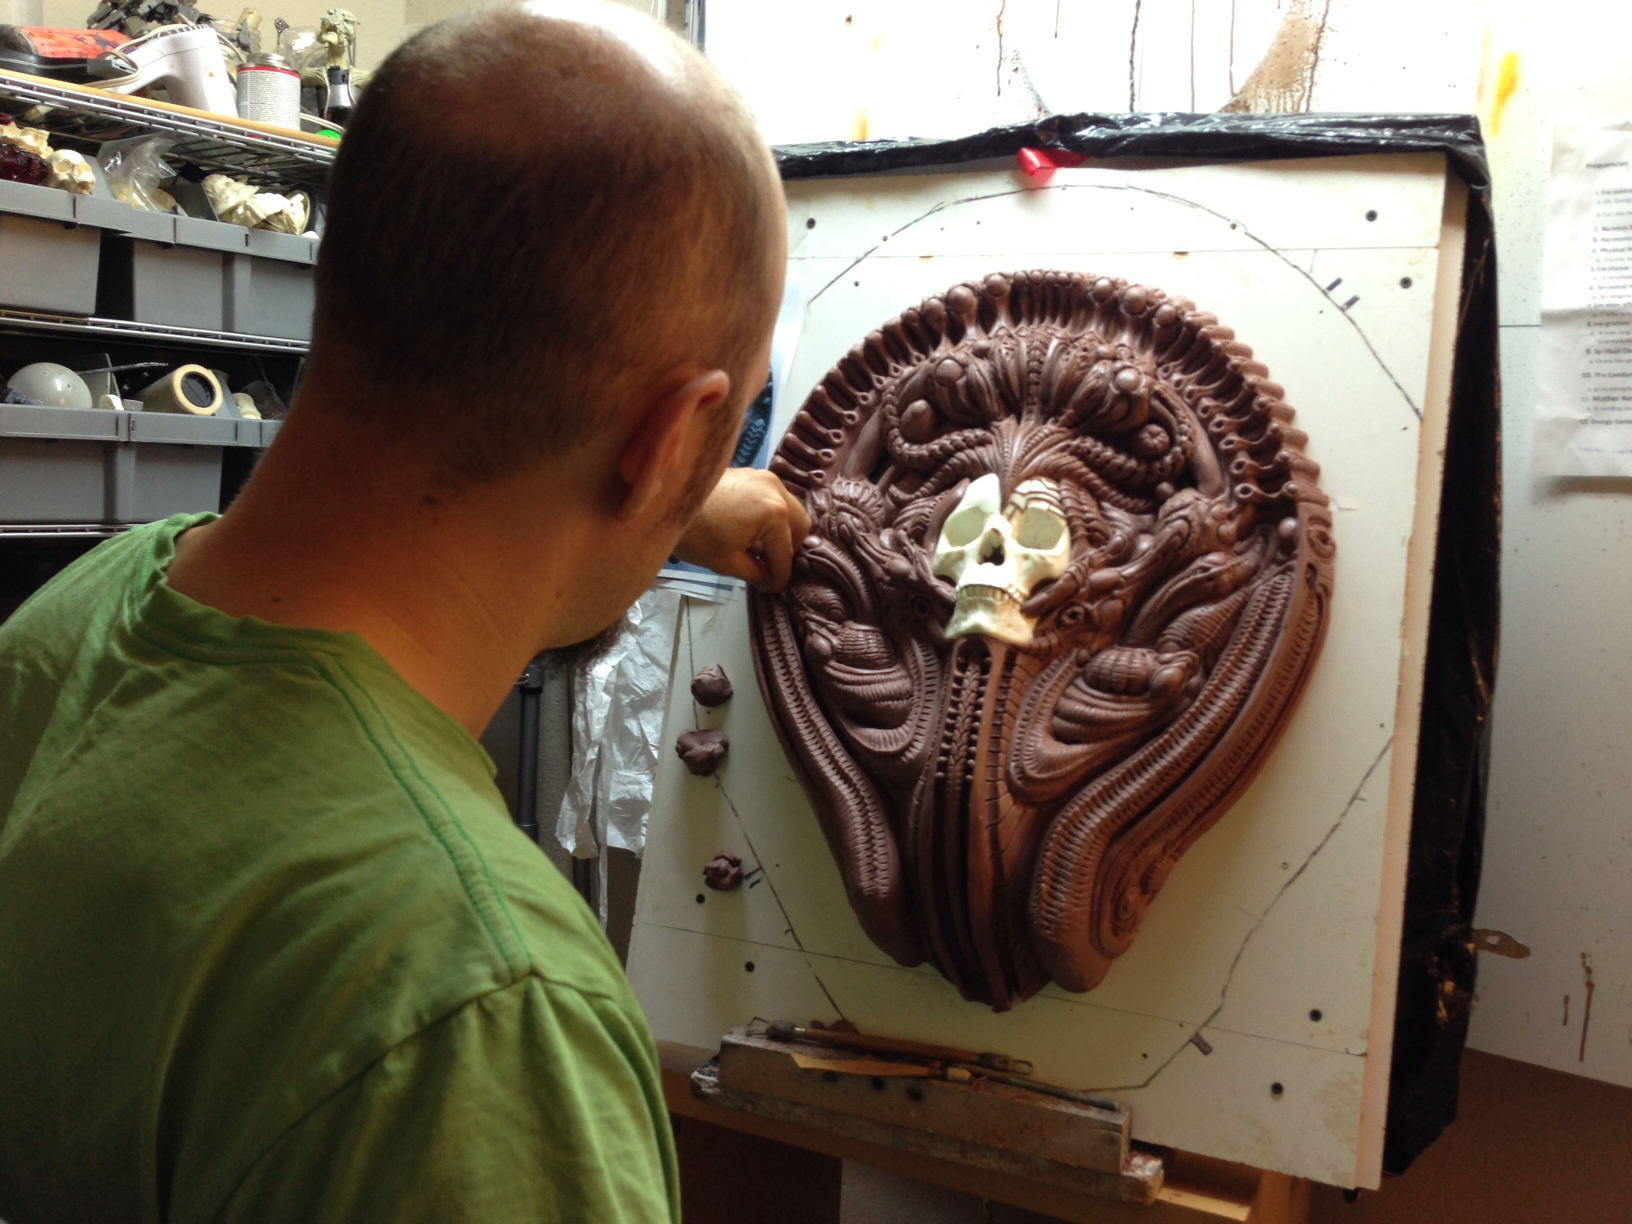
OK, I digressed a little. Sorry, back to how I made the piece. Just to get my bearings, I did a quick sketch of the general shape and details. In the end, I simplified the shapes a bit to make it read better as a cross. My main building material for this project was acrylic. I raided the scrap bins at my local plastics supply store and found some styrene in my garage from long ago.

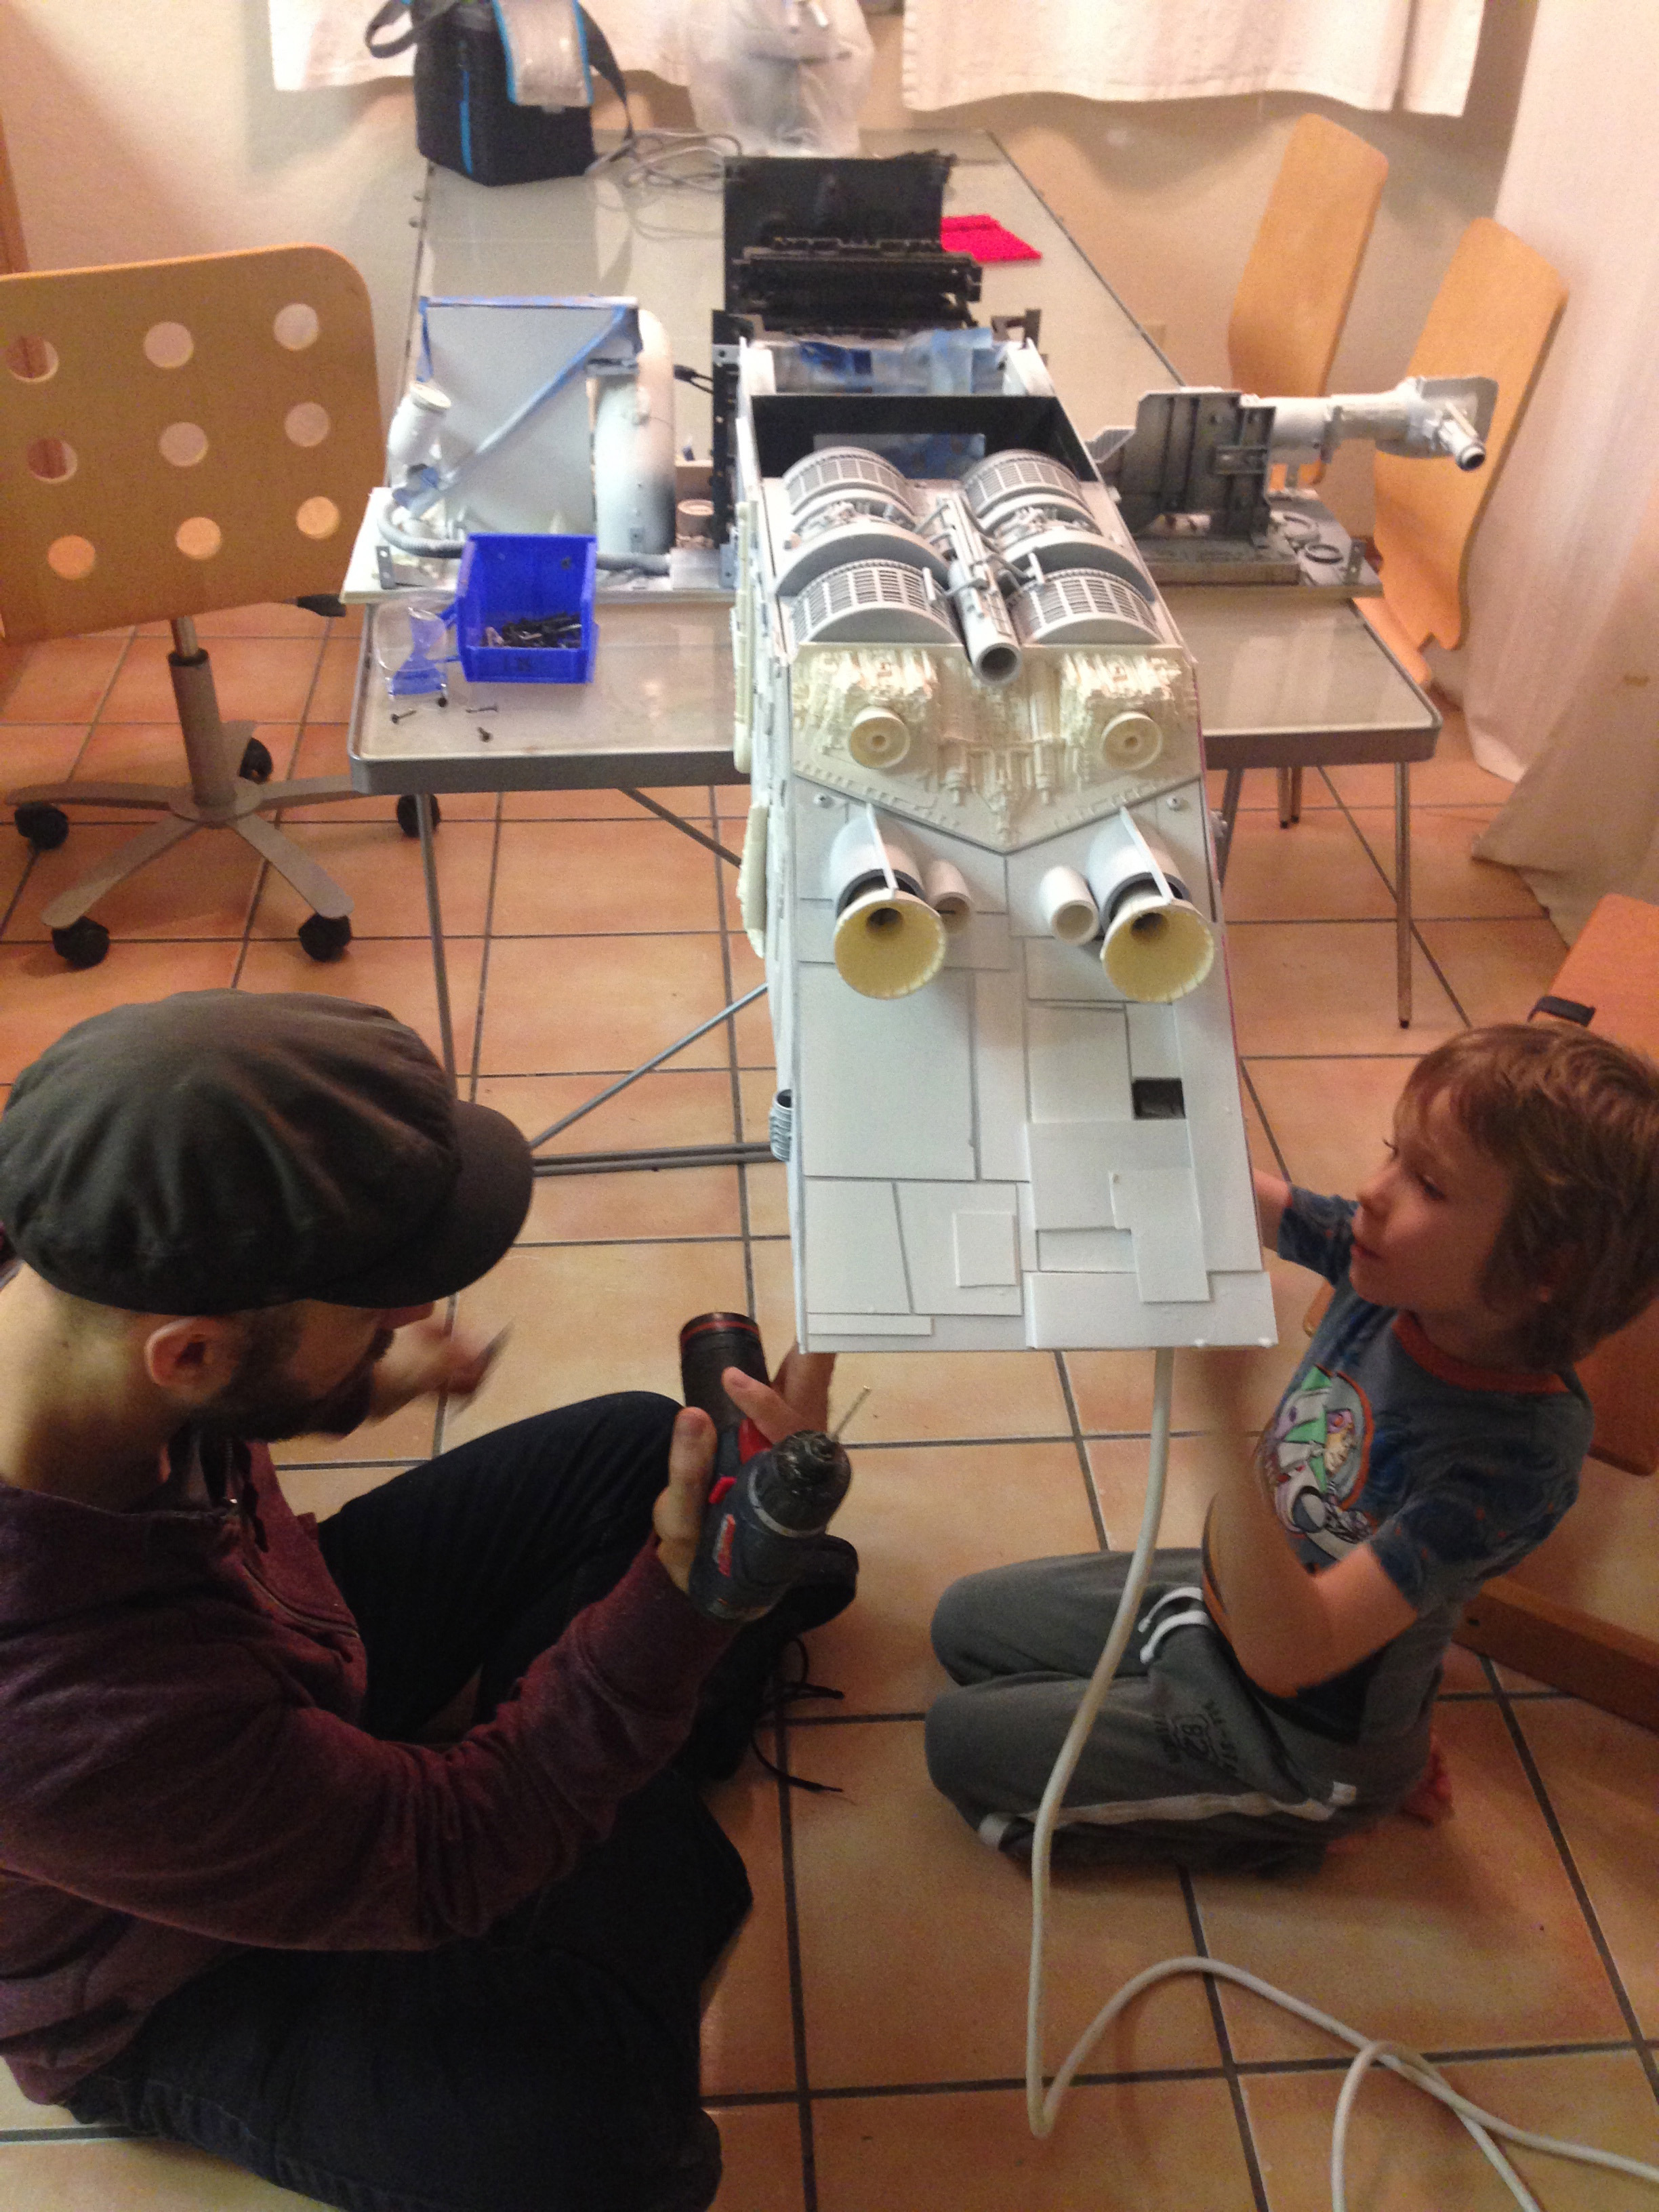
Early on, I had the attention of my son Lucian who was always asking if he could help me with something. It didn't matter what it was, he wanted to try it. I was so grateful to have him around, because it needed a child's touch to make it. I delved down into my own childhood memories as much as possible to stay focused on this.

I was constantly putting on and taking off acrylic panels for fit, detailing, fit again, more detailing, fitting, adjusting, and painting.

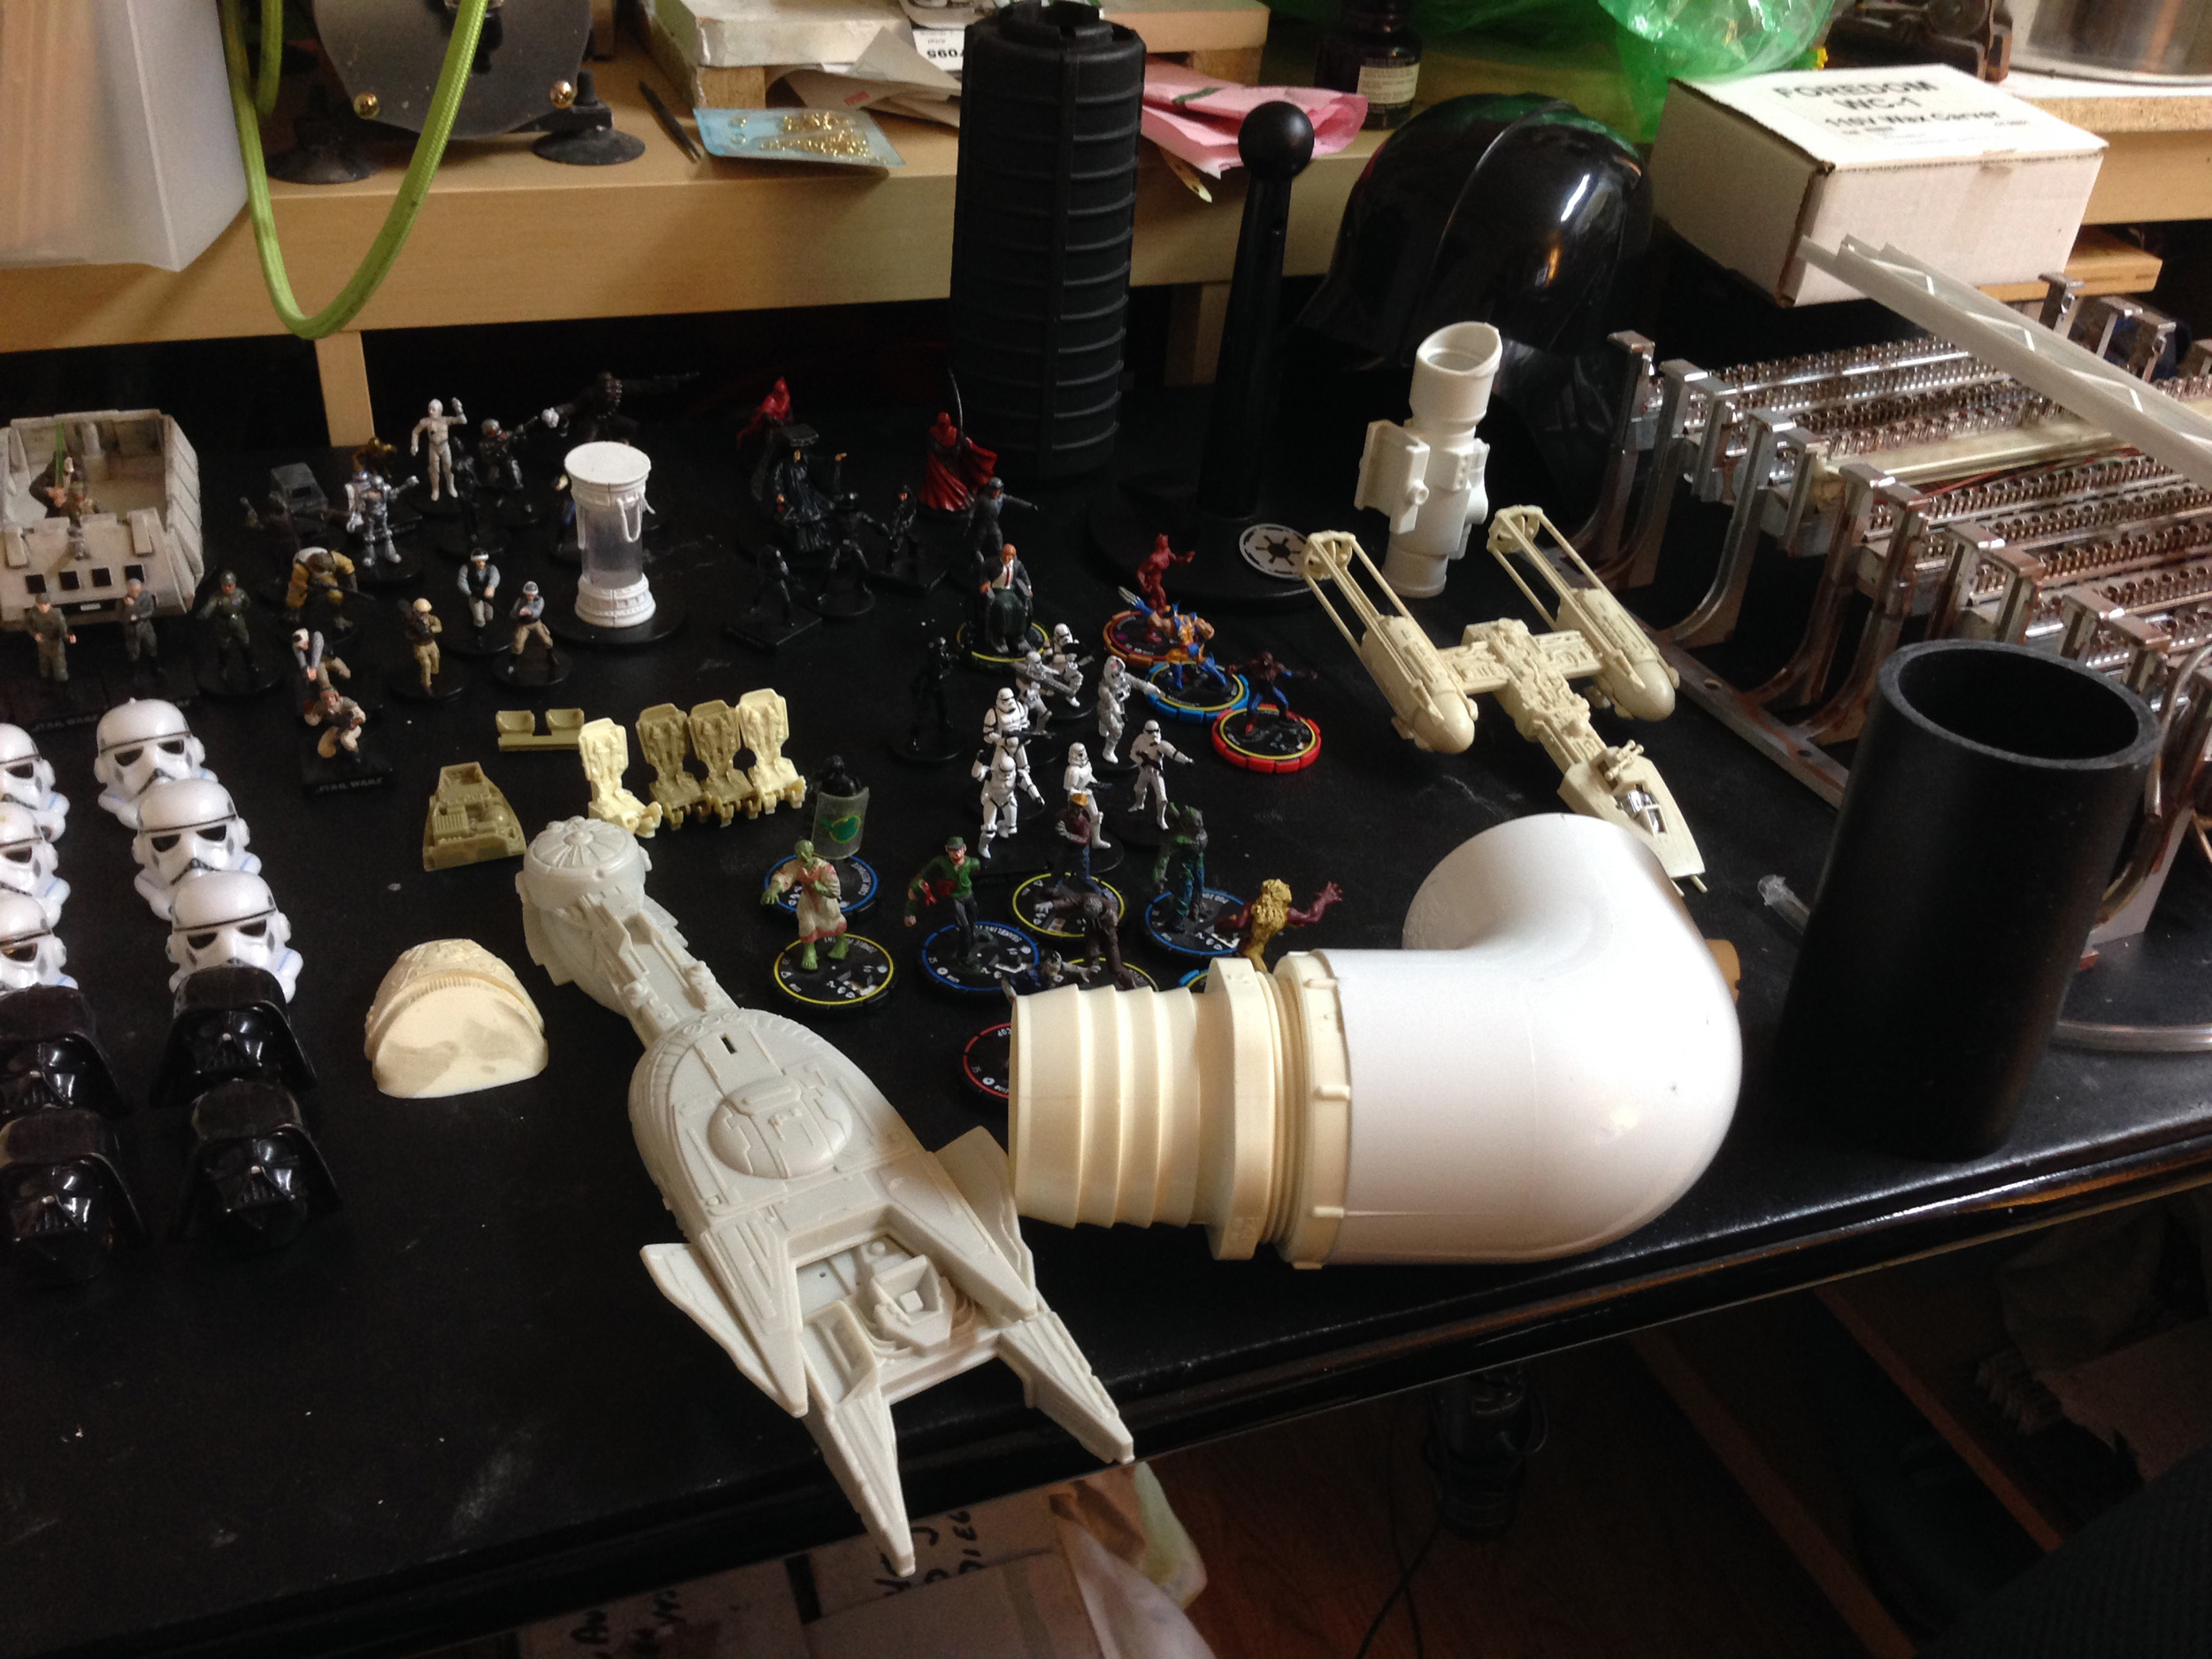
Unfortunately, over the years, I have become allergic to the super glue I use. Now I have to wear a full-face respirator whenever I use it. To give it that "Star-Ship" look, I cut and glued hundreds of pieces of styrene to the acrylic, which translated into weeks of wearing a mask and gloves, closed off in my studio. The worst part of this was that I couldn't let Lucian help me. He was heartbroken and even asked if he could get a mask like mine for Christmas so he could glue, too! I couldn't even imagine it. How ironic. Since then, I have decided not to use super glue anymore. For parts, I used some of my own old Star Wars toy pieces, used model tree parts, and cast resin parts from old Star Wars model kits, specifically the Millennium Falcon and some other old silicone molds given to me by my friend Clint. My good friend Mike even loaned me his 3-foot-long Star Destroyer resin model kit. Looking at that REALLY helped me with the exterior textures of my "Cross Destroyer". I also attached return hinges to make clear window doors over each of the rooms except for the hanger in the center.
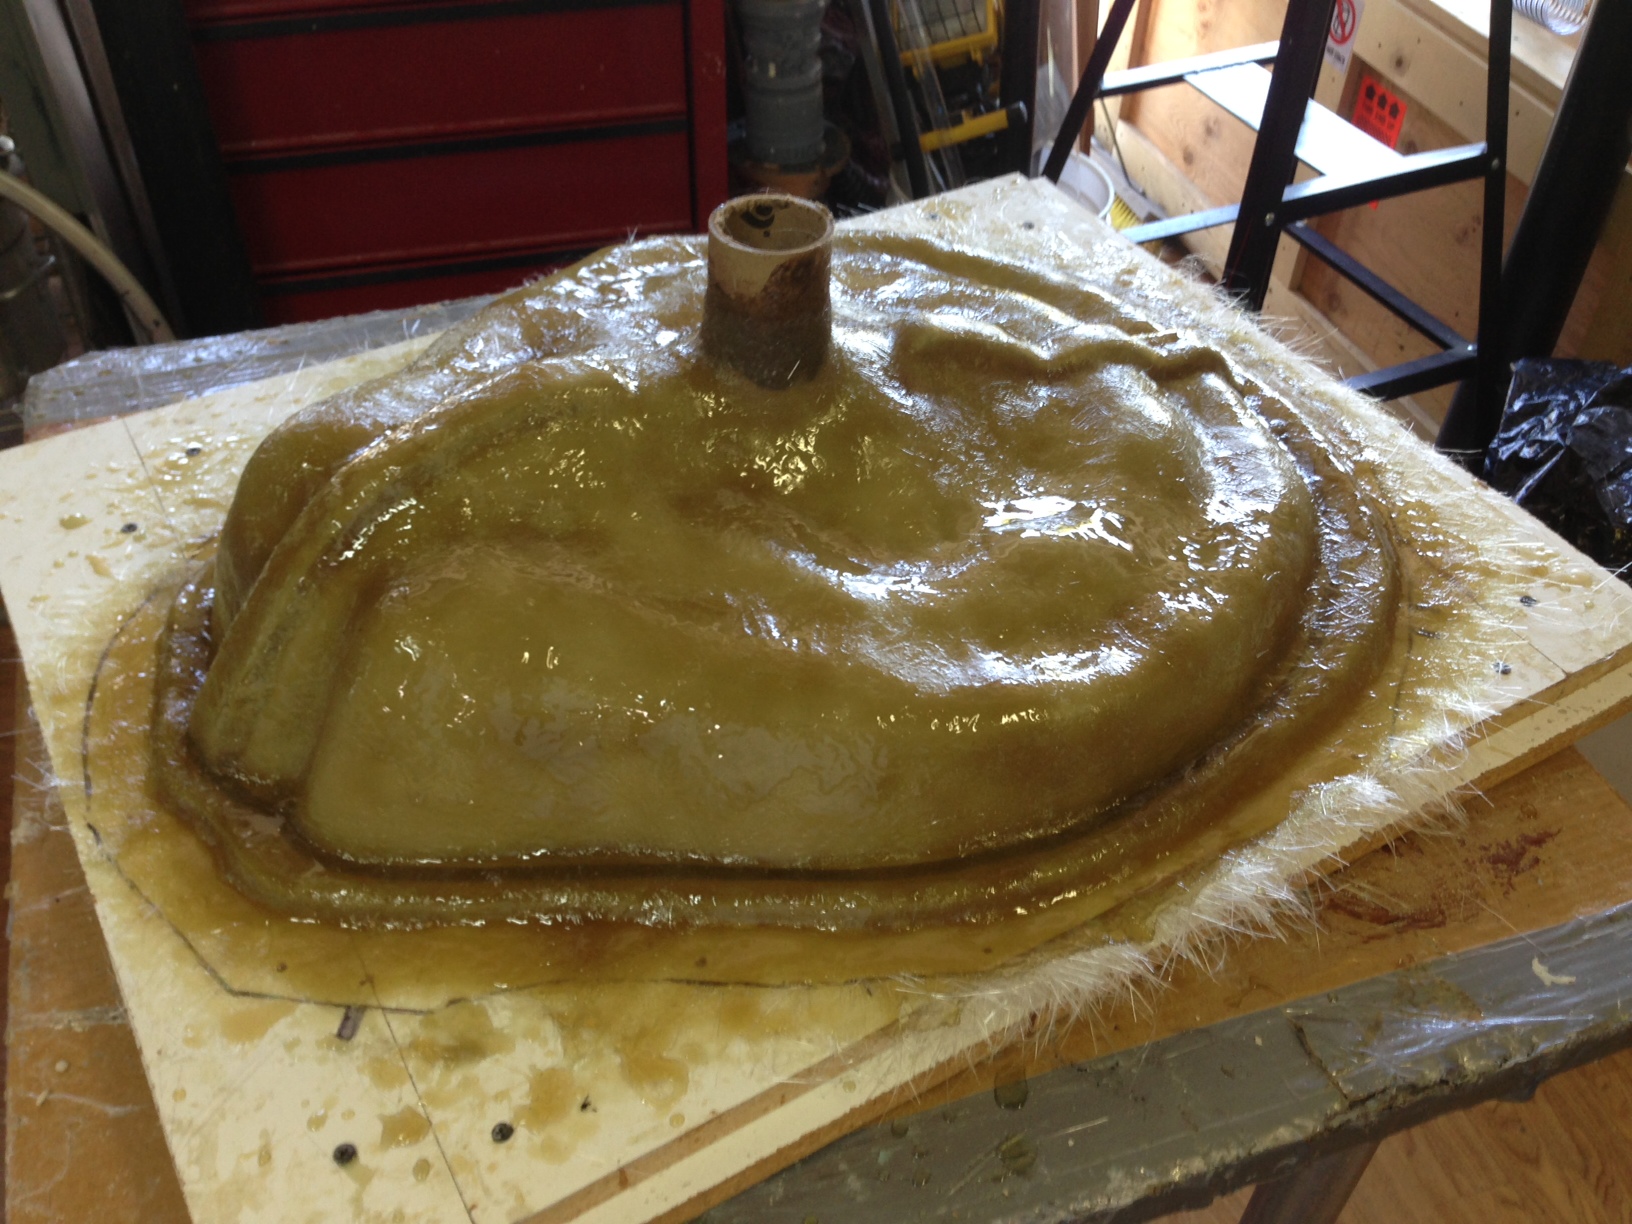
Lucian and I are attaching an additional base to the back of the piece for added support.

Primer is done! It smelled up my studio for days!
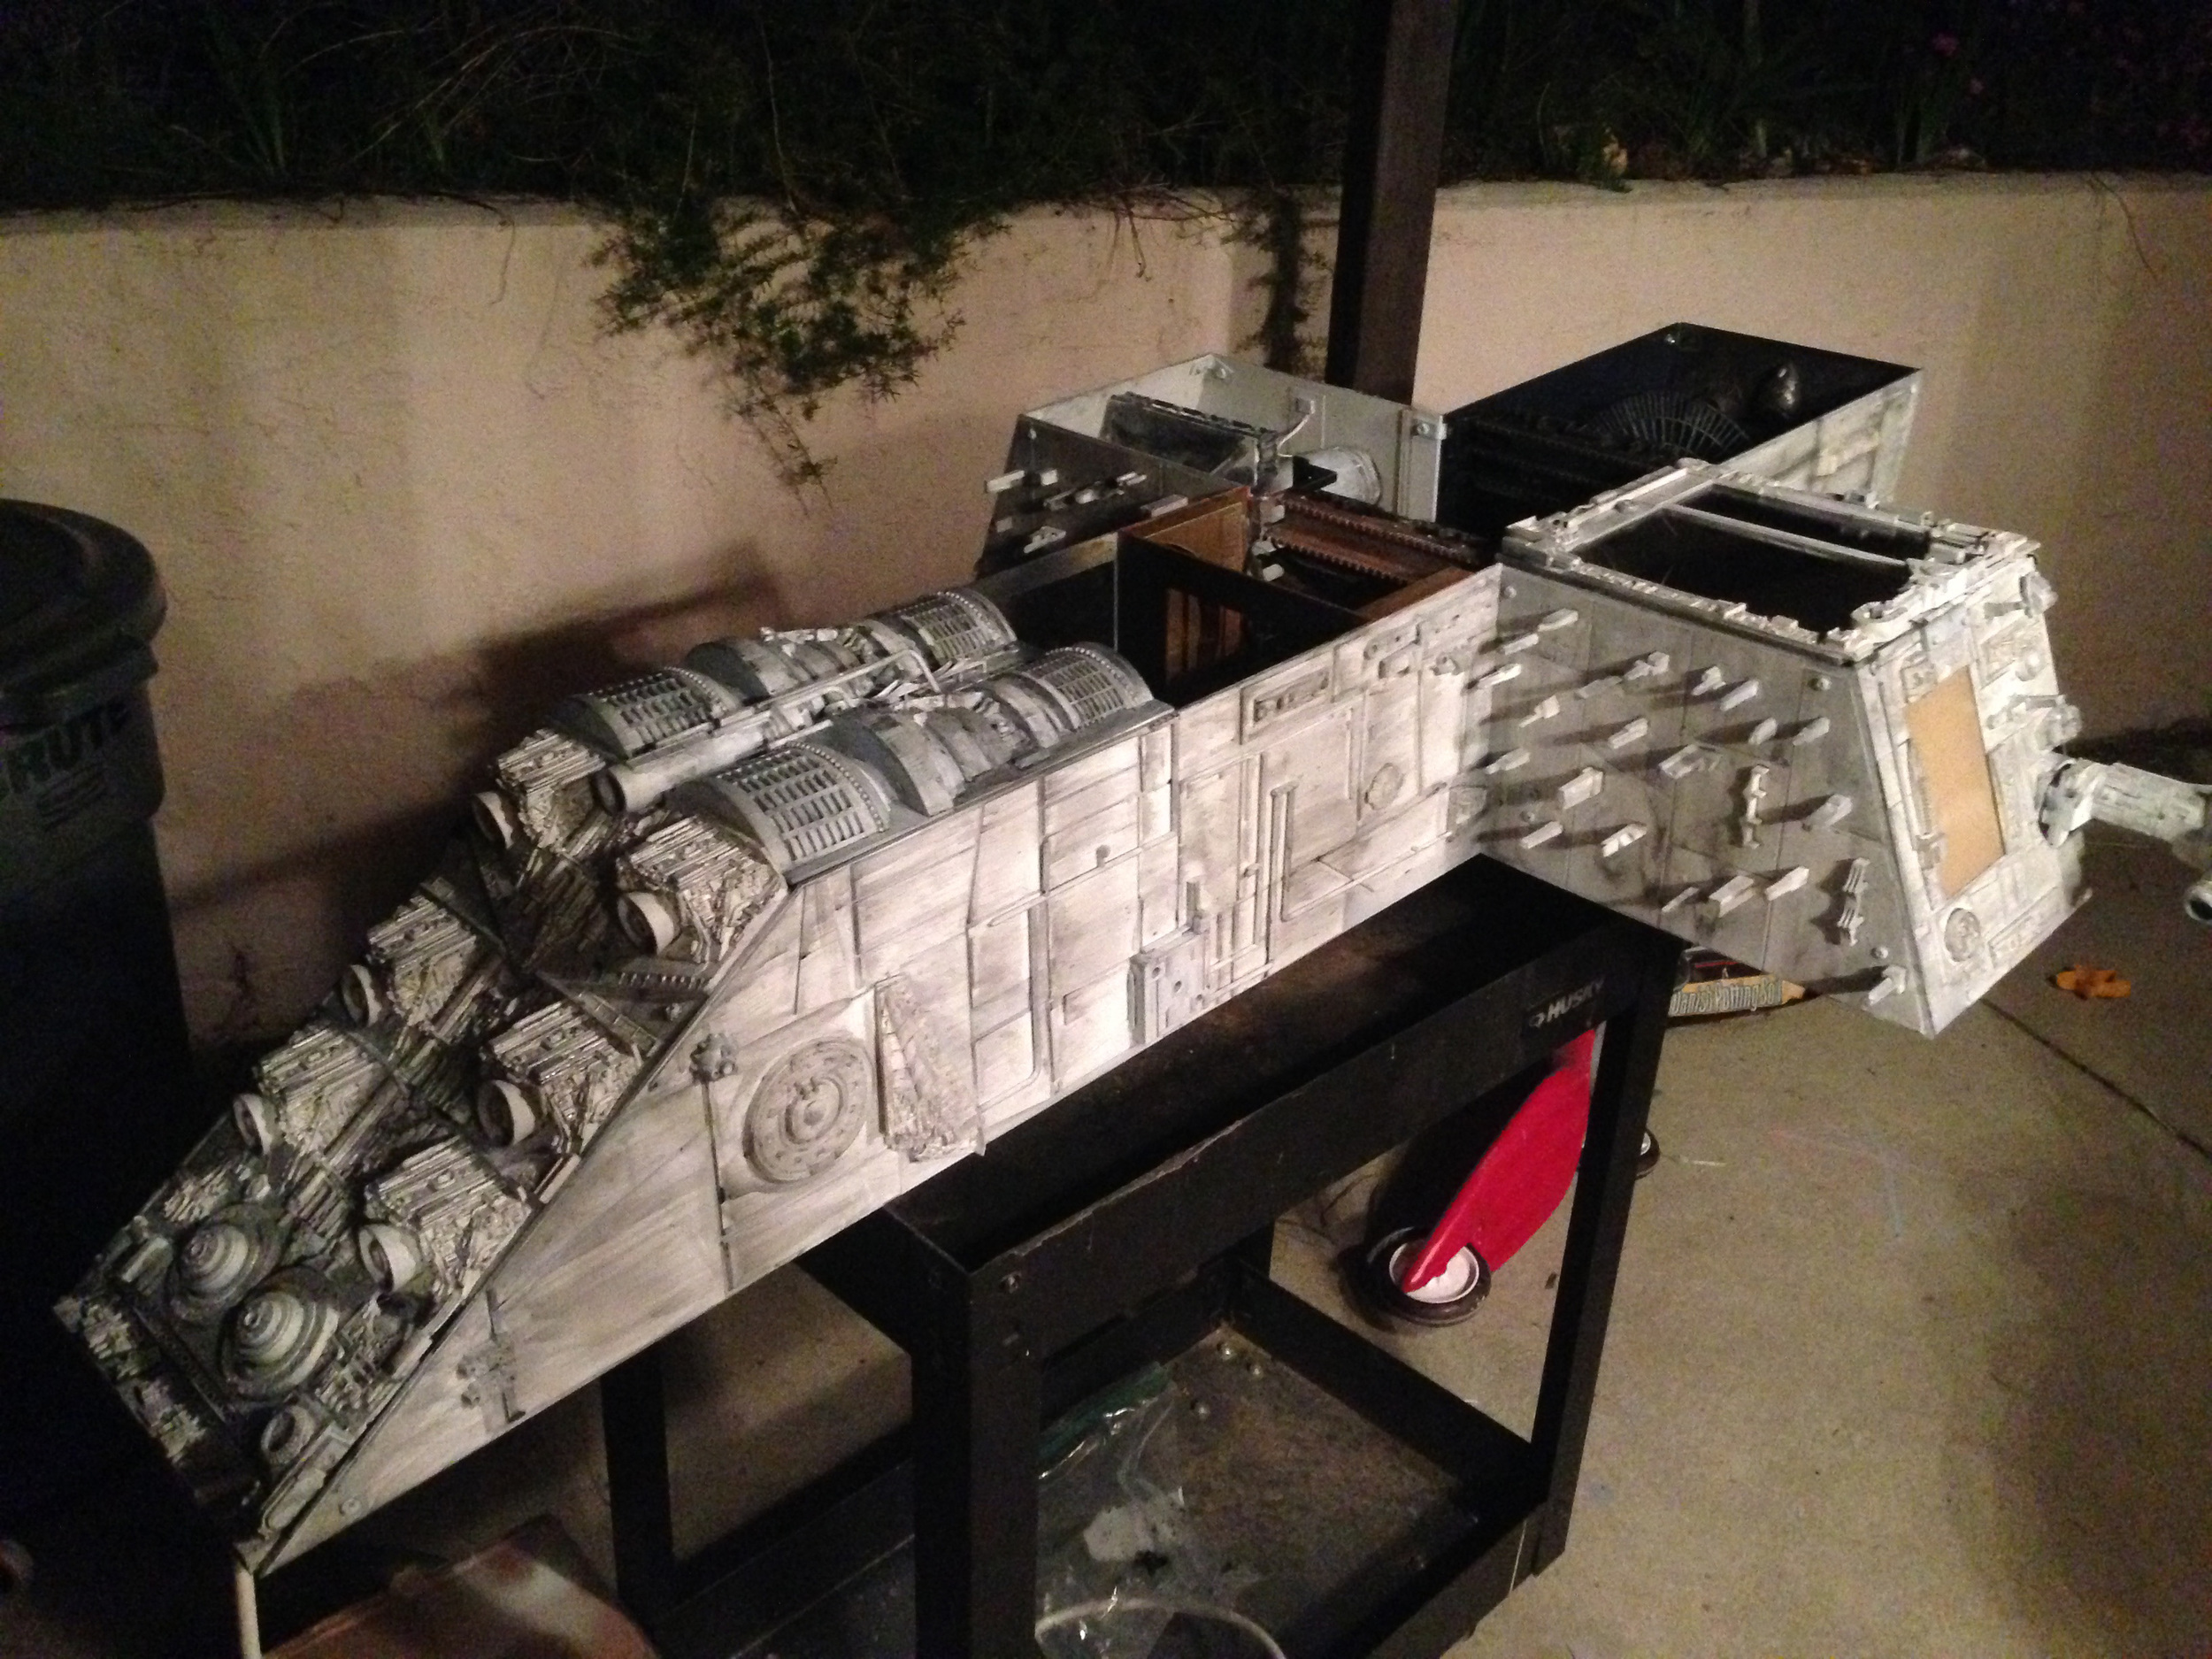
The first wash is applied to the exterior panels. I made 18 acrylic panels for this sculpture. One was a total redo.
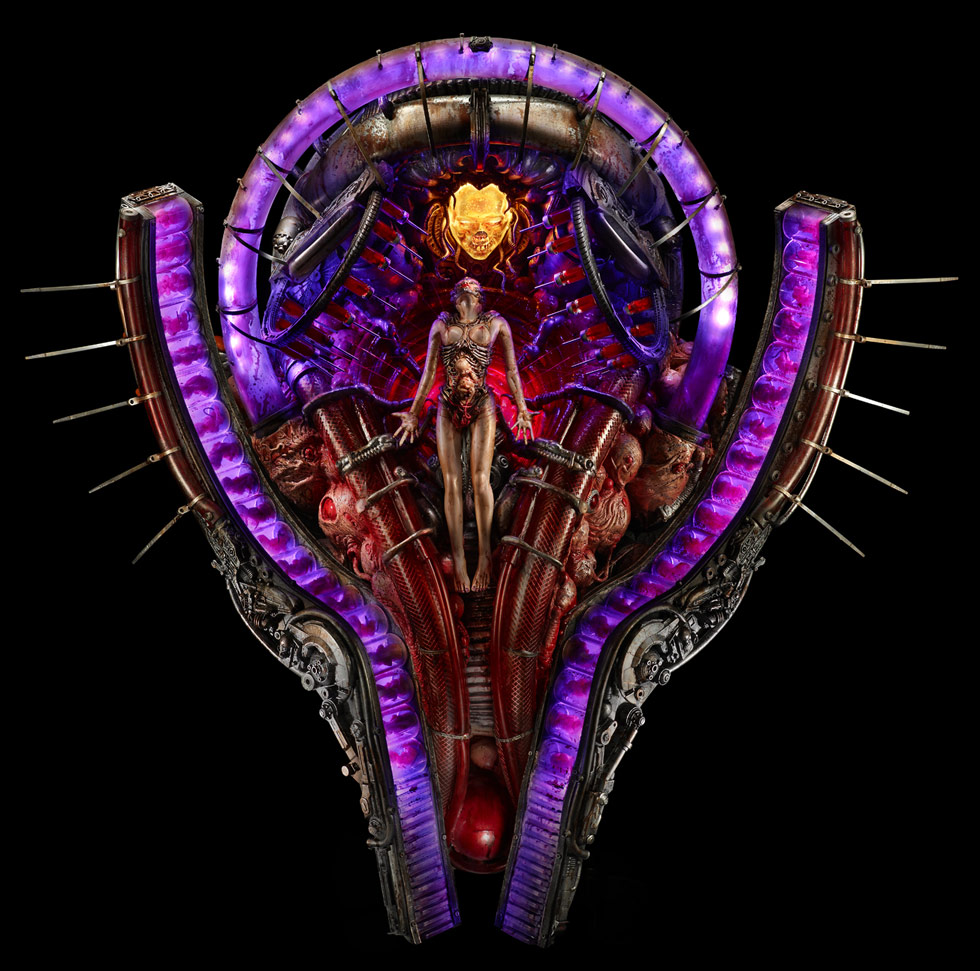
During construction, I constantly toyed with the idea of gluing vs not gluing down the figures. Then, I had breakfast with John and Brenda Romero when they purchased my "Icons of DOOM" sculpture while I was in the middle of making this. During that, Brenda explained a board game she was developing in detail. I came away with a new perspective on art and games. Since I was already using game piece Star Wars figures, I started thinking about making it into a full-fledged board game! When I mentioned it to Brenda, she told me she would like to collaborate! We have not done anything yet, but I am so excited to see what we can make out of the 7 levels in this odd Star Wars shrine of sorts! Figure-based board games are my favorite to play with a group of people.

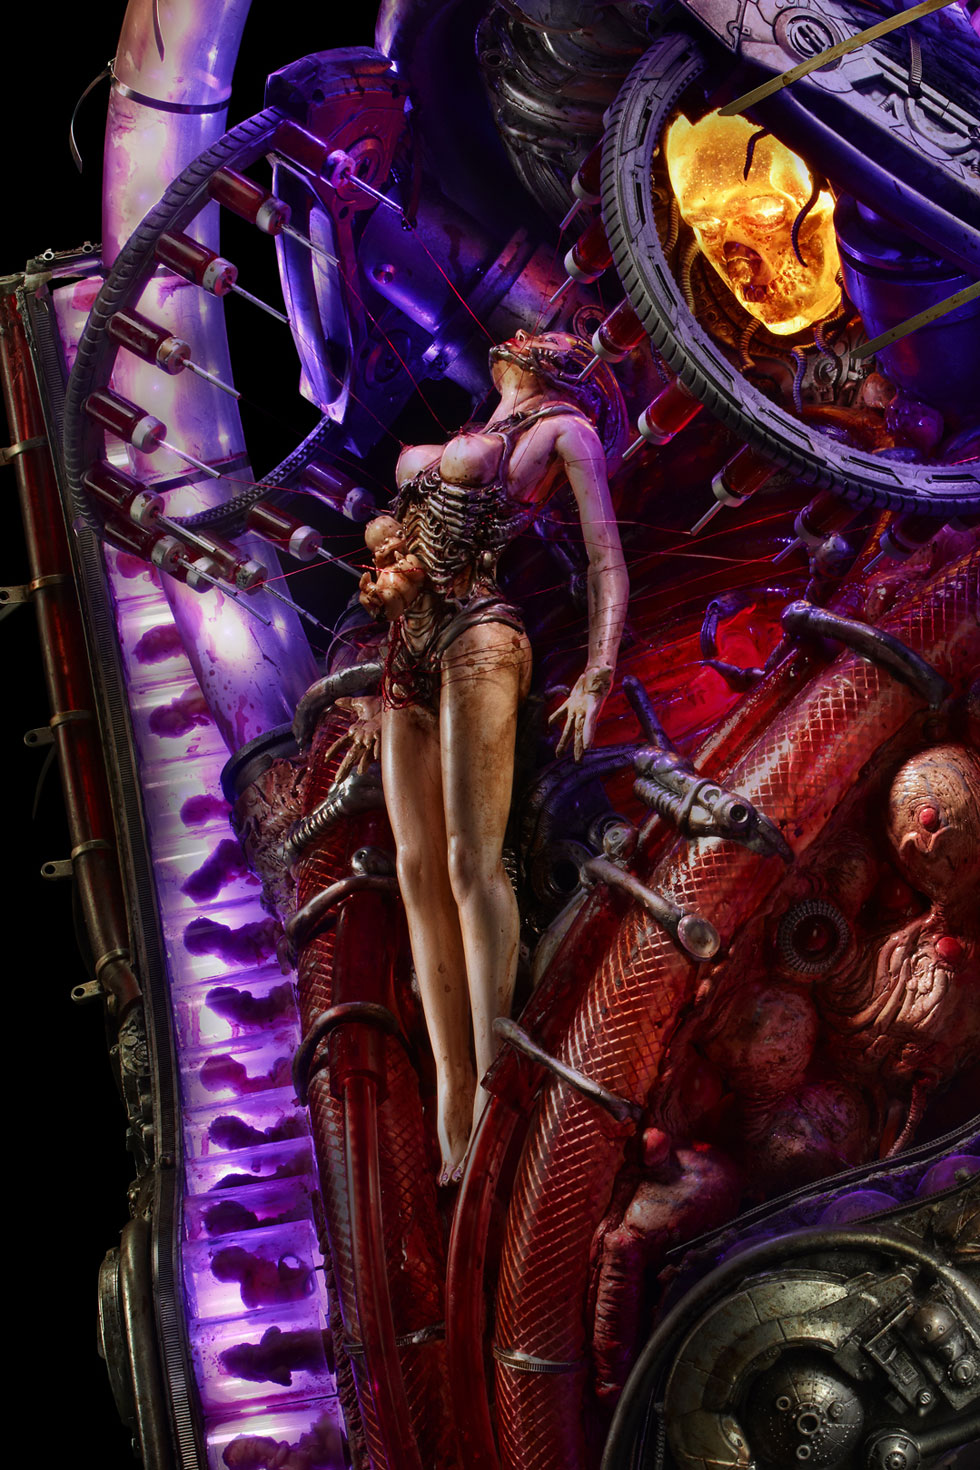
At the top of the "Cross Destroyer" is the Emperor's chamber. It has a working video monitor behind him that runs footage from all the space ship scenes from the original 3 films.

Directly below the emperor's chambers, Luke and Vader battle in the Carbon-Freezing chamber play set. This was fun installing the LED's to get that hot lighting effect.
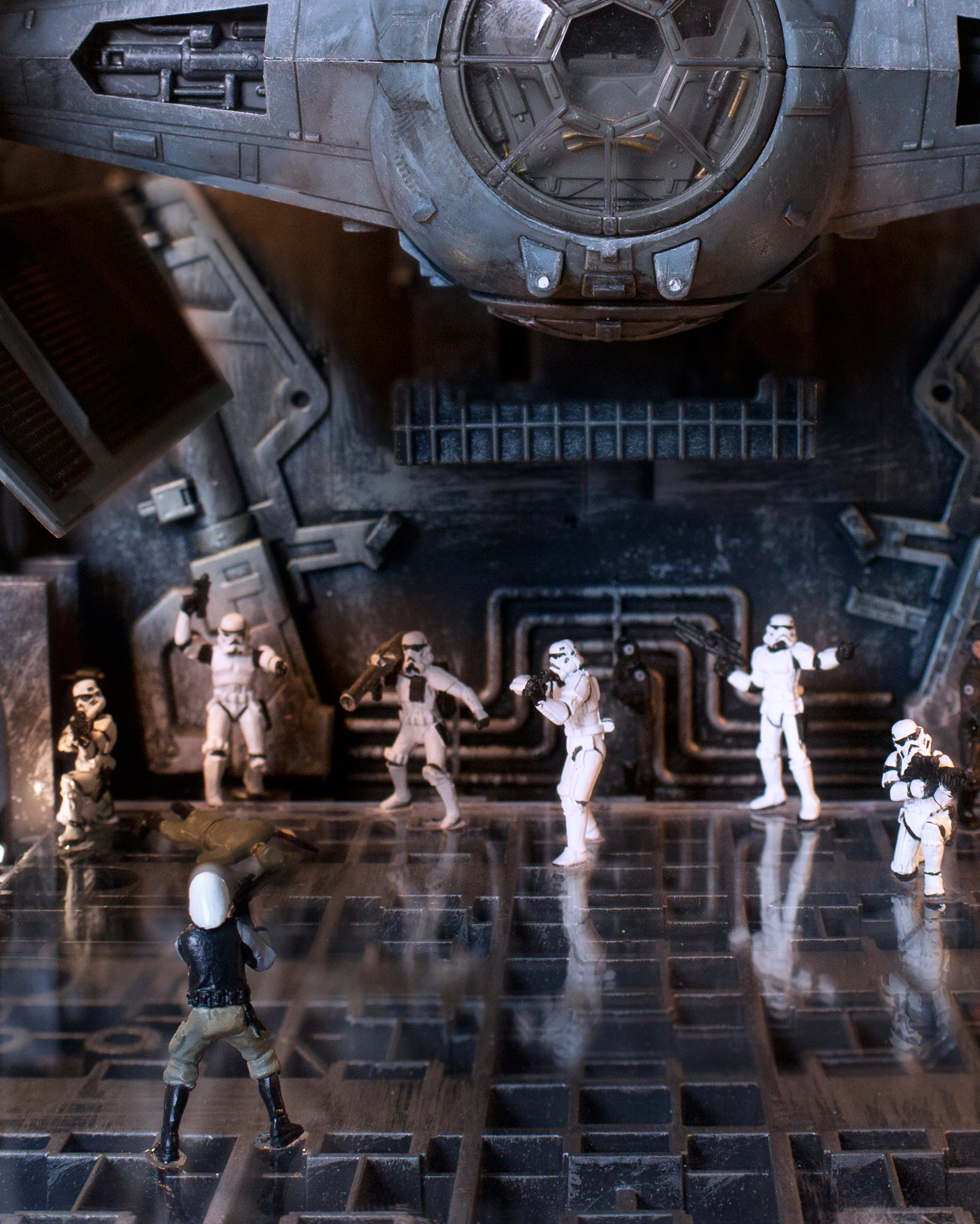

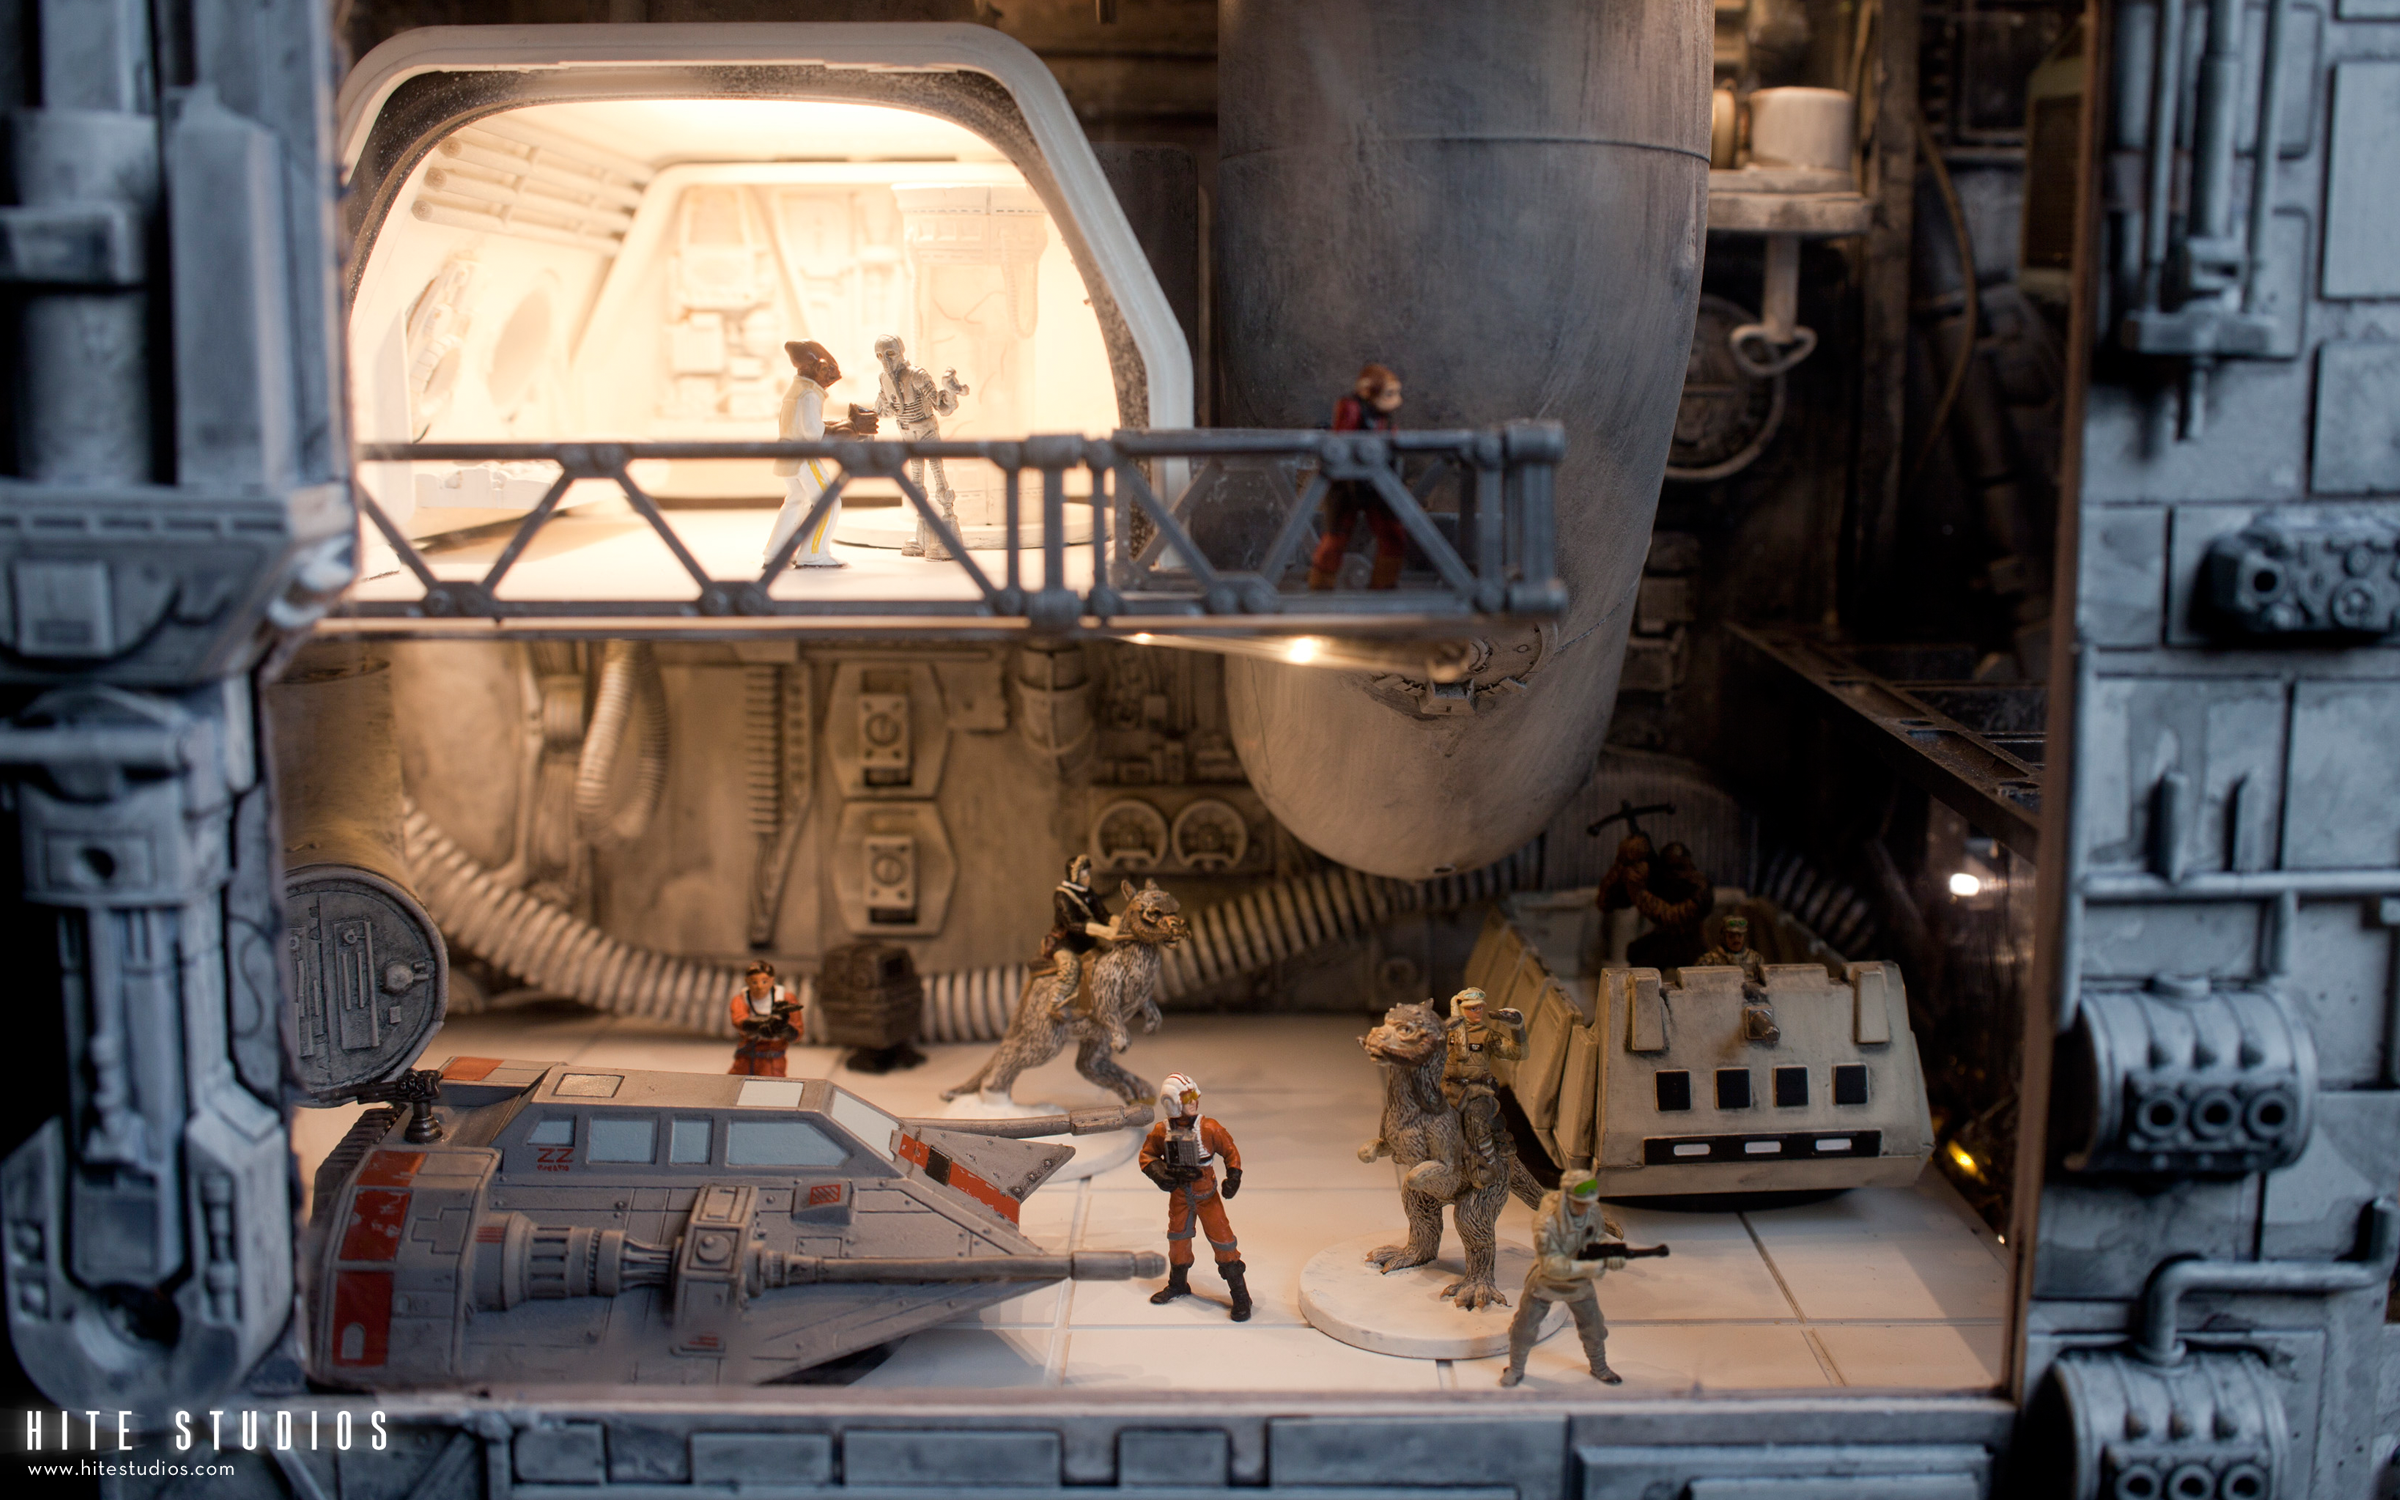
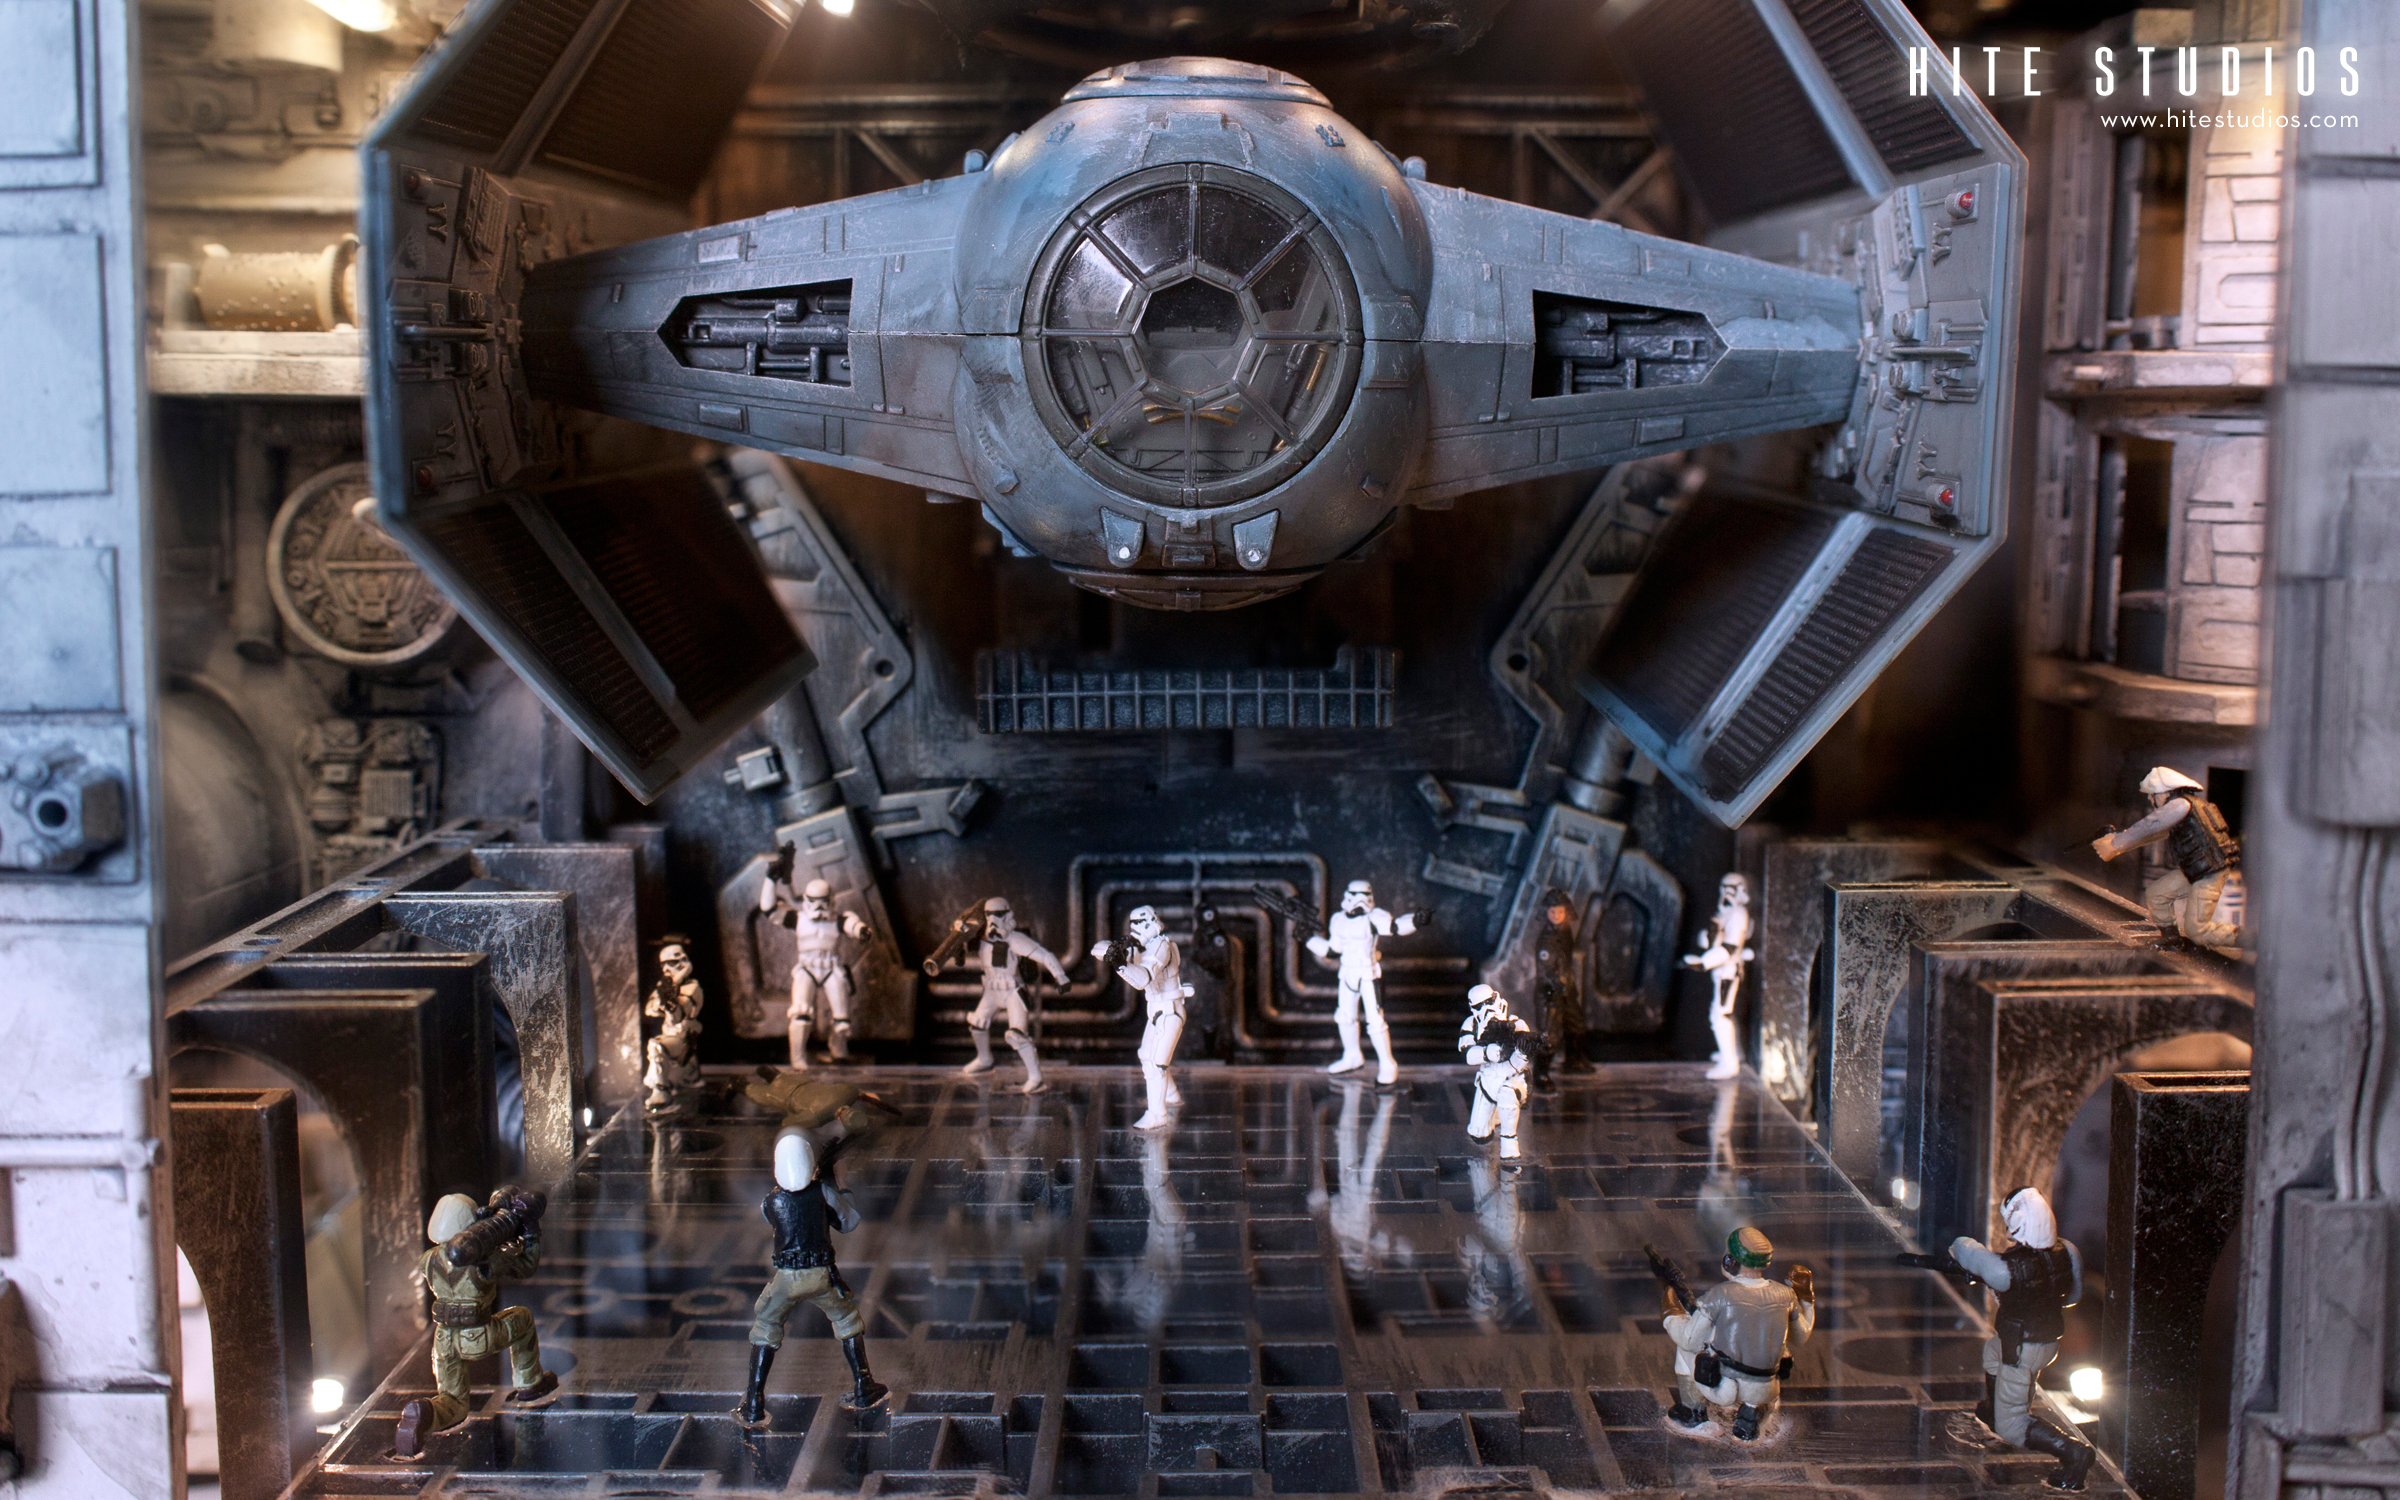
In the very center of the ship is Hanger bay 327. Here a battle rages between the Rebels and Storm-Troopers. Somewhere in this picture you can also see a Star Wars wind up music box that plays the main theme. The Tie fighter is a store bought model Lucian and I built together. The platform everyone is fighting on is from some part of a fiber optic network box I think my uncle Billy gave to me.

To the right of the hanger is the Death Star play set with Detention Block AA-23 and the garbage compactor below with Chewbacca inside. Although I must admit, the garbage compactor reminds me of an outhouse, with Chewie howling for toilet paper.


To the left of the Hanger is my rendition of the Echo Rebel base on Hoth. With the exception of the figures and vehicles, this is all scratch built. The medical lab with Bacca tank was the very first thing I built. I love that entire scene in Empire.
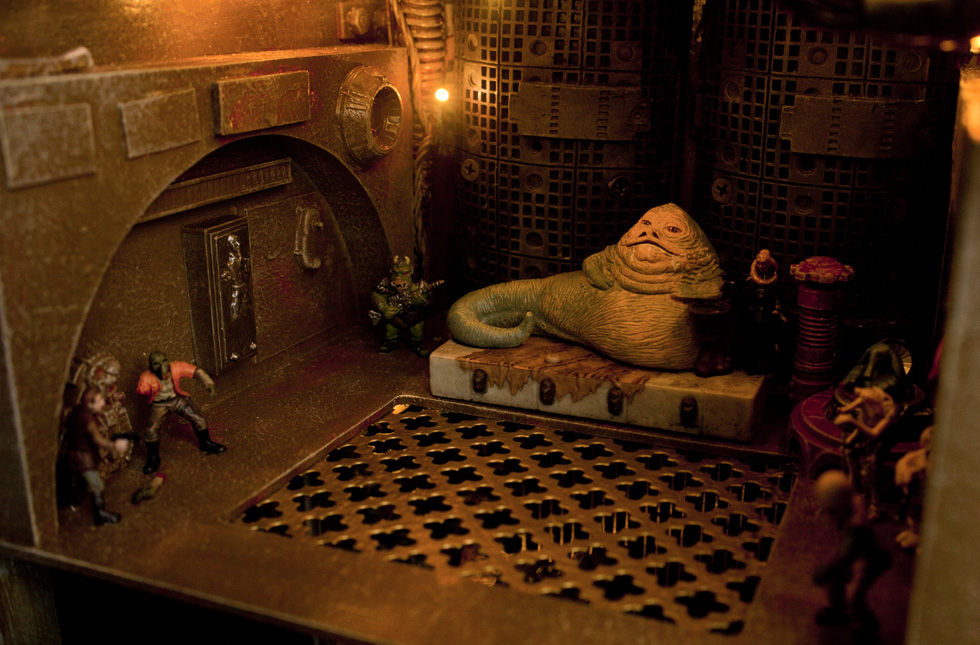
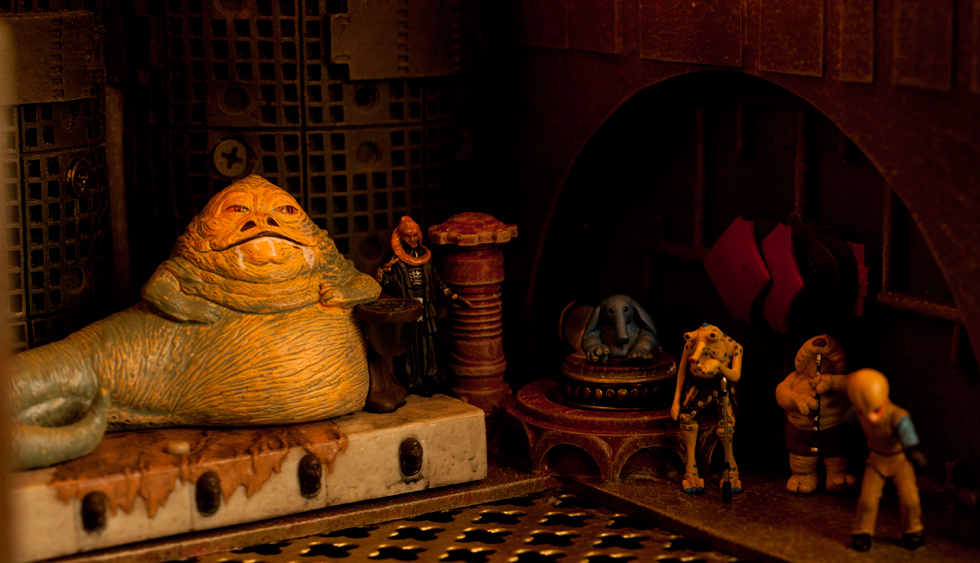
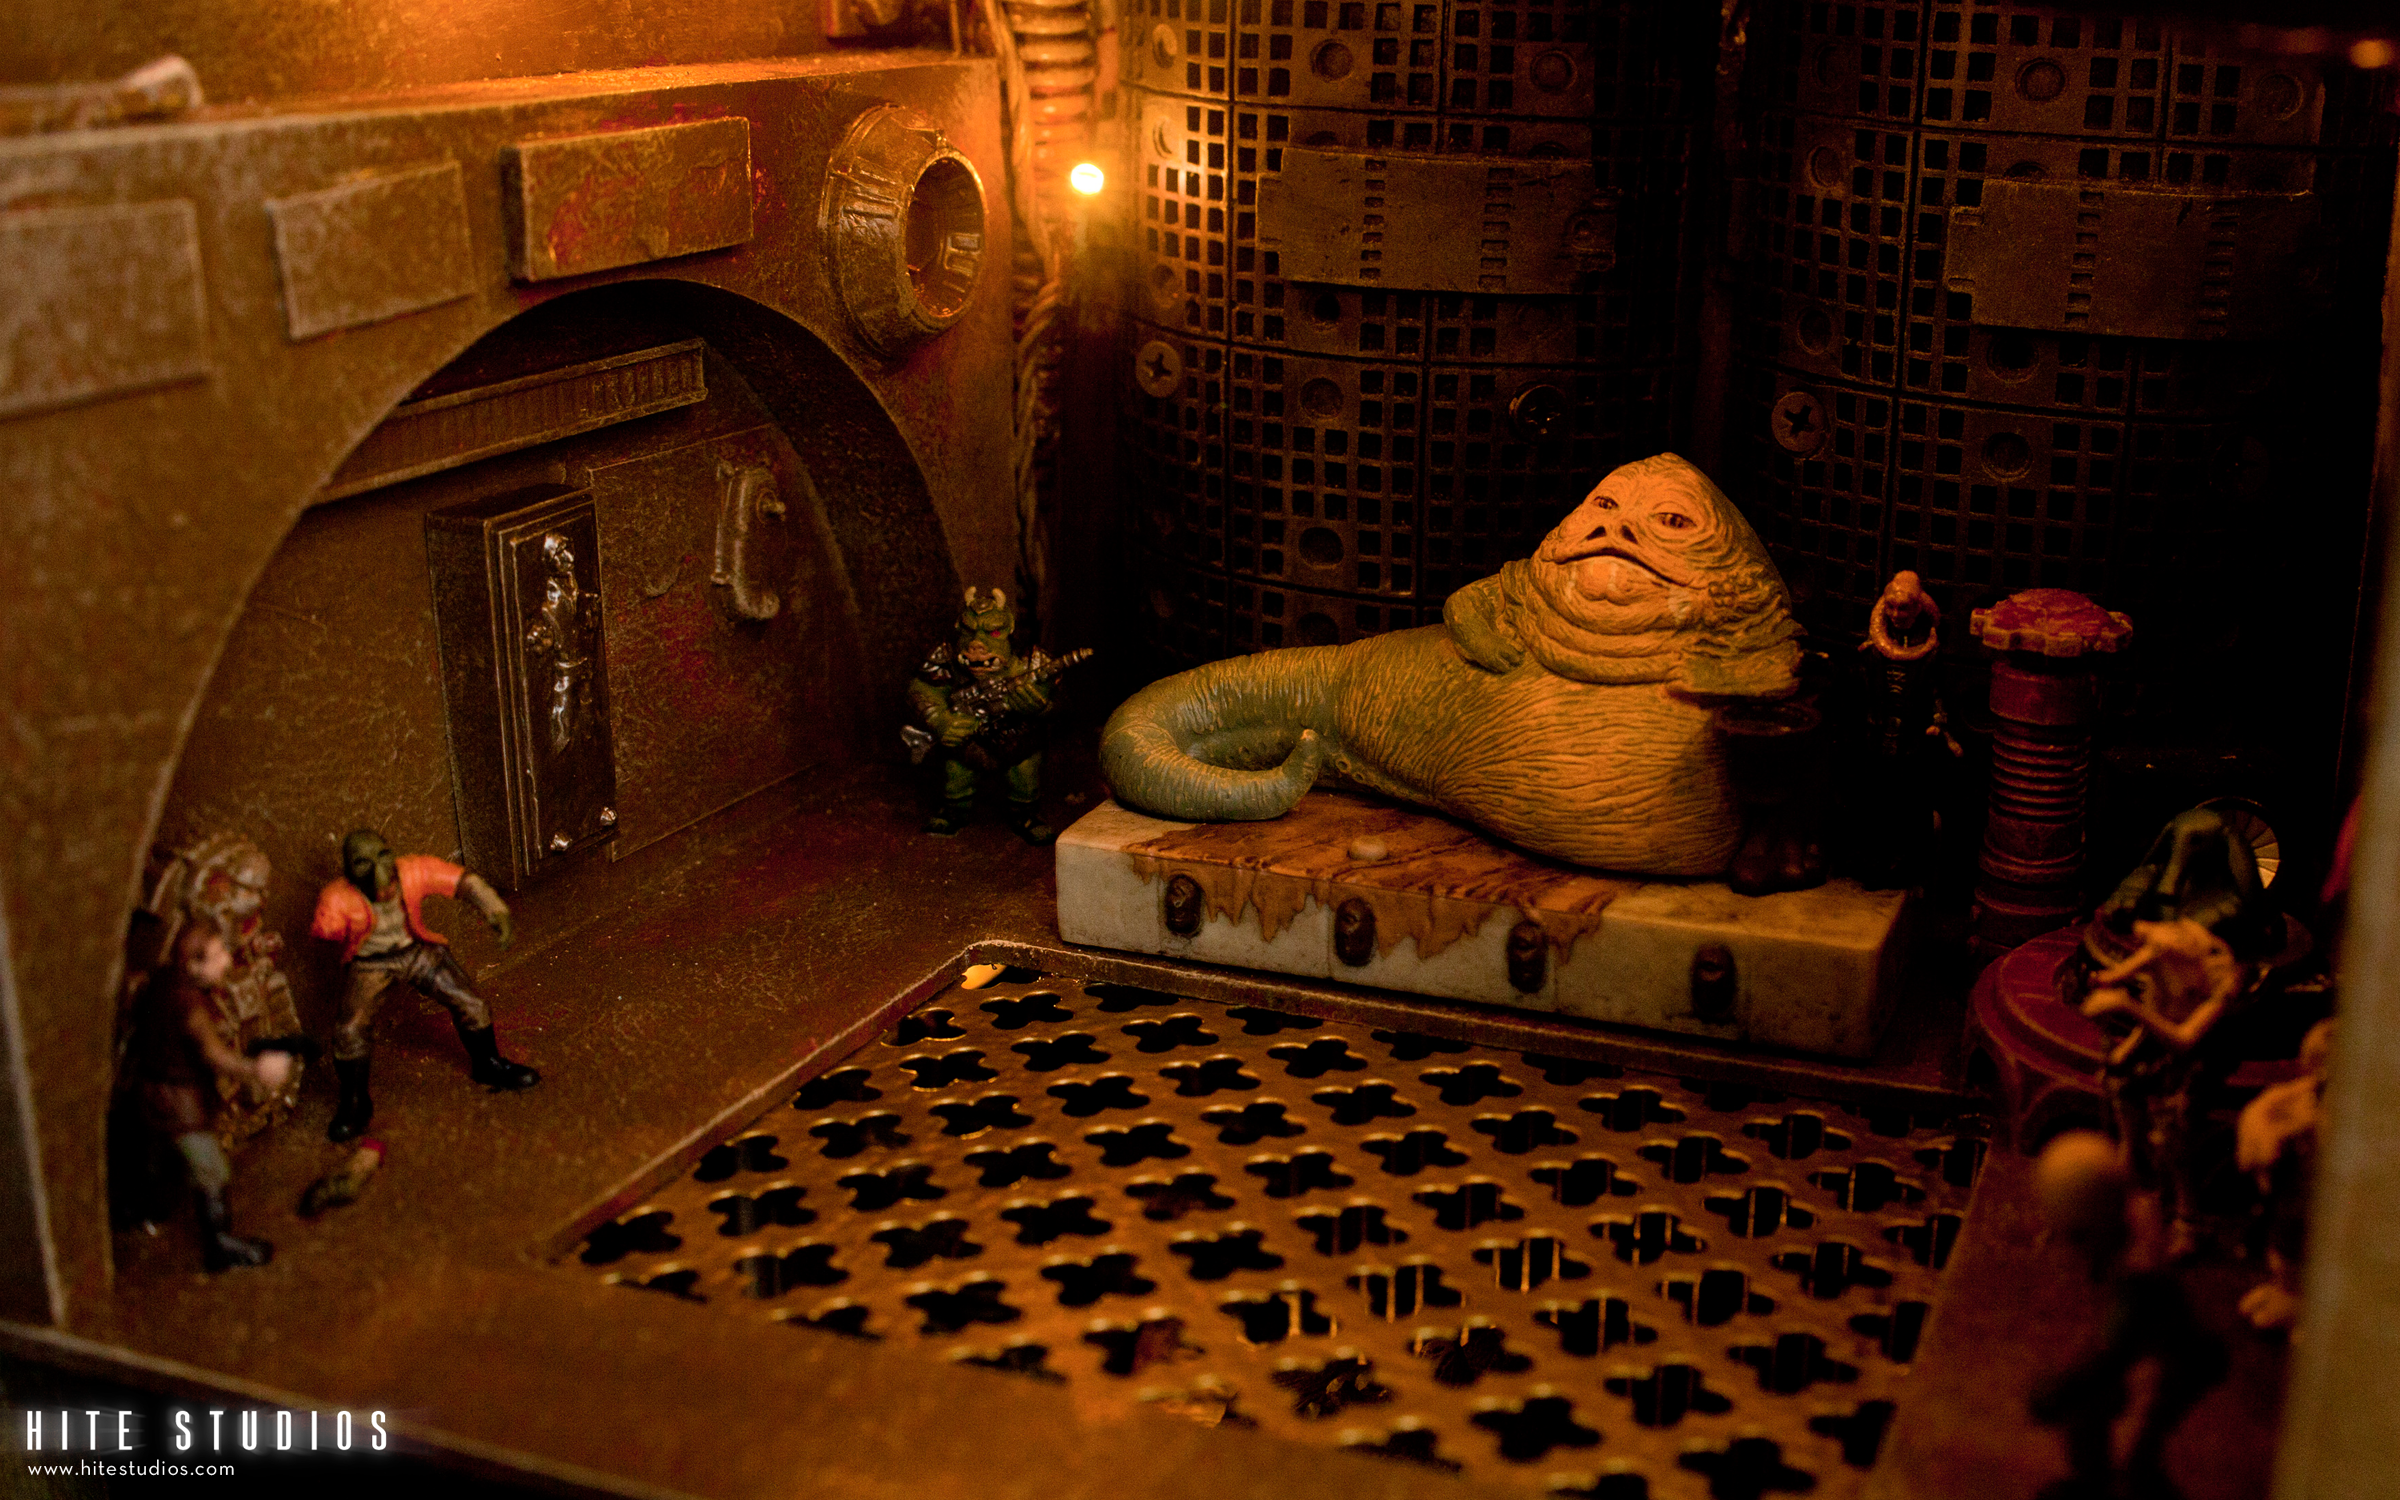
Below the Hanger sits Jabba The Hut's palace. Jabba is a Christmas tree ornament with a neat sound recording. Han Solo in carbonite is resin cast from my ice-cube mold. My favorite part of this little scene is the screen where you can see the room below. This screen is typically used in Catholic confessional booths.
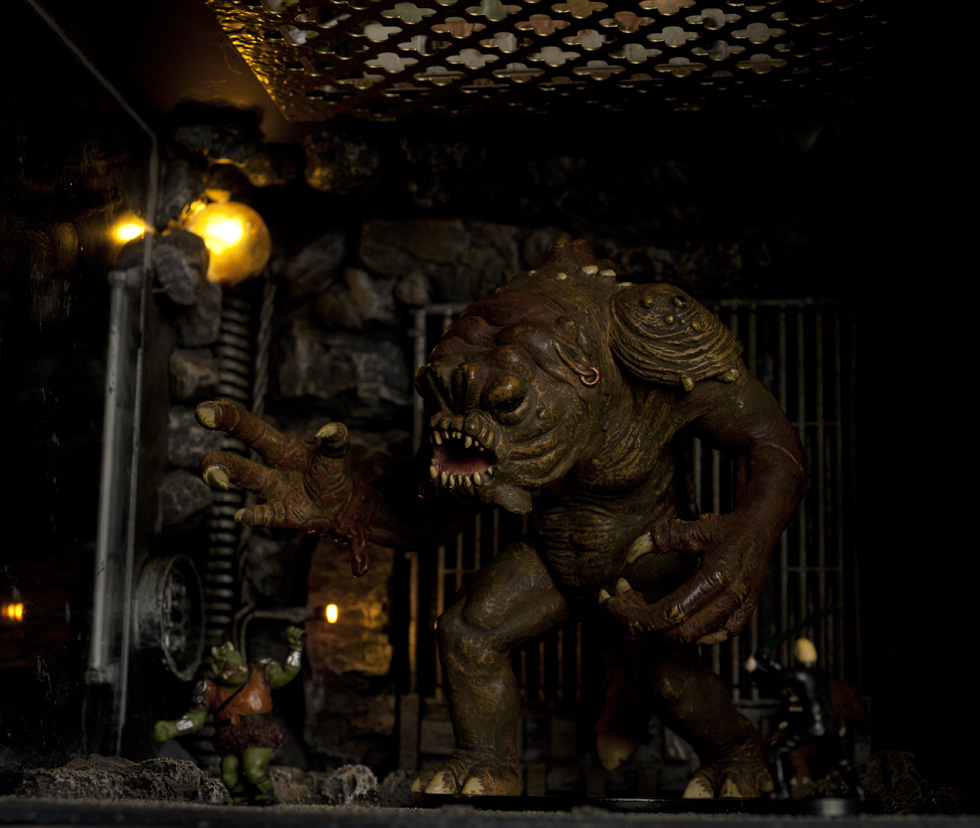
And of course, below, Jabba is the Rancor pit! For the stone cave, I used model railroad scenery rocks cast from rubber molds. At first, I was going to use real stones, but hydrocal plaster tends to be lighter and the stones are designed for that smaller scale look. The Rancor is a game piece. He was tricky to find, expensive to get, and not the best sculpt in my opinion but time was not on my side with this sculpture. Someday, I might have to sculpt my own.


All in all, I think it took me about a month to create from start-to-finish once I got the "Cross-Destroyer" idea. The best part is, the leftover toys I didn't fit into the sculpture will go to my boys to play with. Who knows, maybe we will make another one someday. Hope you like it and you enjoyed reading about my journey to build it!
If you've read through my very long-winded post, thank you! I've attached 5 free desktop image downloads you can use for your computer. Comment below this post if there's another piece I've done that you would like to see a desktop image for.


Check back to my site soon, as I'll have a video up on the sculpture.